Thursday, December 28, 2006

Welcome to 2007!

So, as we head towards New Year's Eve our thoughts turn to resolutions and vows of how the next year is going to be better. While it's fine to consider areas that need improvement, try to include resolutions that make you happy--drinking a really nice glass of wine on the weekends, planting some exotic flower in the garden or taking a ceramics class. It will be a lot easier to keep those ones than the plans to loose 40 lbs. or be less sarcastic or buy fewer shoes.

I have a couple of Yoga resolutions that I thought I'd share--you all can keep me on task. Plus, once I've published them, I'll have to follow through, right?
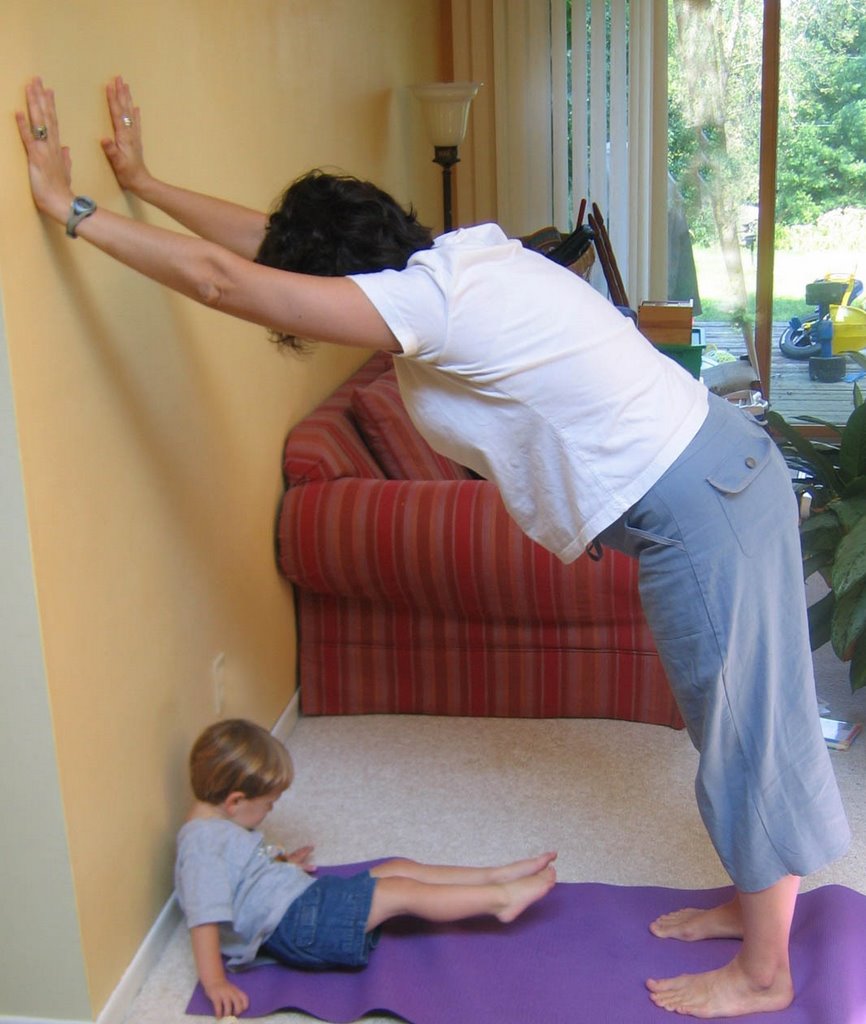
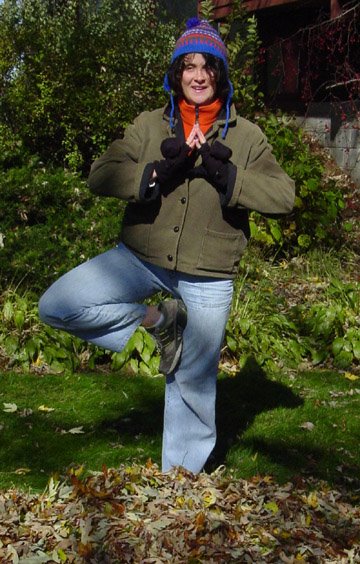
1. I want to do one yoga pose every day for 5 minutes, each side. It's always easy to let the home practice slide when you're teaching, so this resolution will help me reconnect with why I like doing yoga so much. Maybe I'll share a few revelations...I've got to discover something during 10 minutes of Trikonasana!
2. I'd like to explore audio-blogging. I know the written practices and pictures are helpful, but I suspect it would be easier for people to do the sequences if they could just download them to their computer or ipod and listen as they practiced. I have the software and the digital recorder, I just have to play around with it. Stay tuned!
3. I hope to continue posting at least twice a week. I got a little behind over the Xmas vacation, but now I don't have any holiday preparations as an excuse.

So, have fun and enjoy this last weekend of 2006 before we all have to start behaving again.

Happy New Year!

Friday, December 15, 2006

15-Second Vacation

When we were in grad school (MFA ’96, UTexas at Austin…lo, those many years ago), my friend Polly had a great stress-relieving technique. When the work started to pile up and deadlines loomed, she whipped out a little picture of a tropical beach and took a “15-second vacation.” Soon, all the costume-design grad students had little clipped views of beaches, waterfalls and mountains taped to our lockers. The photos of luxurious resorts were a little silly, and probably exacerbated any money-issues we had, but they made us smile and lowered the tension for a little while.

Give it a try. Right now the combination of end-of-semester/holiday/family gathering/winter demands are enough to freak anyone out…especially if you find yourself not having time to do yoga (horrors). Find a picture of some place lovely—without any people, so you can imagine yourself there—and post it near wherever you get the most stressed. These days, you could even make it a screen saver if you need to “vacate” before you start working on the computer. Visualize yourself in the scene, doing whatever you find relaxing and invigorating, and shut out the here and now for 15 seconds. If you can fit in a quick breathing exercise, even better (see July 4, Breath and the Ball Gown). Try and savor the escape and when you return, keep the positive energy flowing as you move into your next task. It won’t make the to-do list any shorter, but it might make it feel less oppressive.

I like to visit La Peruse beach in Maui. Wherever you go, Have a Great Trip! ©Brenda K. Plakans. All Rights Reserved.


Sunday, December 10, 2006

Our Friend, The Spine

I always like to see diagrams of the spine, because it reminds me of what an amazing feat of engineering it is. A straight back really isn't straight at all, but a series of gentle curves that creates a "spring" that acts as a shock absorber for us bipeds. Imagine how jarring each step, stumble or jump would be if the back was as straight as a pole. We would have to walk around with our legs continually bent so that we wouldn't topple over every crack in the sidewalk.

Of course, remember that these curves are gentle. Any time you exaggerate these curves for too long, you are guaranteed a backache because the disks in between each vertebrae get squished unevenly, aggravating the nerves in the spinal column. When you slouch in a chair or hunch over a computer, the various sections of the spine get compressed and that's what leads to a sore back at the end of the day (exaggerating these curves continually will eventually cause your back muscles to stretch in a way that holds the spine in that position permanently, and that will really hurt). One good solution is to find a chair that supports the spine evenly; another is to keep the back aligned and work the muscles to encourage that alignment (ahem, regular yoga practice).


Twists are a great way to work on this alignment and get the blood flowing into the muscles that support the spine. They are a really nice end a long day of standing on your feet or sitting at a desk. Try this sequence while visualizing your spine in each pose and notice how much more open and loose the back feels at the end. (I'm away from my camera this weekend, so I'll post accompanying photos on Wednesday).

Twisting Sequence
Sukhasana (Easy Pose) Sit tall, lining up the ears, shoulders and hips and balance the upper body over the lower. Relax the shoulders and try to lengthen the spine without arching the lower back or jutting the chest out.

Dandasana with Hastasana (Staff Pose with Overhead Arm Stretch) Maintain the alignment of the torso, while pressing the backs of the legs down and pressing the soles of the feet away. Keep the knees from locking by engaging the thigh muscles. Stretch the palms away from the chest and then overhead, keeping the neck long and the shoulders away from the ears. When you lower the arms, try to keep the lift in the side ribs.

Seated Twist Come back to Easy Pose and realign the spine. On the first exhale start turning at the lower back; on the next exhale move the twist into the chest; on the third breath twist across the shoulders and, if you want, the head. By moving into the twist slowly, you originate the movement in the lumbar spine (the least flexible part of the twist) and move it throught the thoracic into the cervical spine (the most flexible). Change the cross of the legs and repeat the twist to the other side.

Tadasana with Hastasana (Mountain Pose with Overhead Arm Stretch) Come to standing and realign the torso. Again, lengthen without exaggerating any of the curves in the spine. Stretch the arms overhead (fingers crossed with the other index finger on top) and find length in the side ribs without lifting the shoulders or arching the lower back. Keep the lift as you lower the arms.

Trikonasana (Triangle Pose) Begin with the feet apart and the arms overhead to lift the side ribs, then lower the arms to shoulder height. Turn the feet to your Triangle stance and stretch over the right leg, keeping the side ribs long. As you breathe into the back, try to deepen the twist with each exhale by starting in the lumber spine and moving up to the neck as you did in the seated twist. Come up and repeat to the other side.

Prasarita Padottanasana (with a twist) (Wide-Legged Forward Bend) Step the feet apart another foor or so from your Triangle stance and make sure you are grounding evenly through the soles of the feet and keeping the inside ankles long (don't let the feet collapse to the outside edge). Lift the arms overhead to lengthen the side ribs and then lower them to your hips. Folding from the hip crease, bring the torso parallel to the floor and support the body with the hands on a block or the floor. Move one arm so that hand is beneath the breastbone. Start twisting towards the other hand and stretch that arms toward the ceiling so you are looking to one side and the shoulders are lined up over the hand to the floor. Then return to center and switch sides.

Supine Twist-Lie on your back on the floor and bring the knees to the chest and then roll both knees to one side as you ground the back of the shoulders to the floor and stretch the arms to the side. Look towards the opposite shoulder from the knees, if you want a deeper twist in the upper back. Repeat to the other side.

Savasana (Corpse Pose)-Release the knees and stretch your legs out. Take a minute to realign your whole torso, so the neck is long and the head is lined up with the tailbone. Sink into the support of the floor and concentrate on letting all muscles relax. Thank you, Spine! ©Brenda K. Plakans. All Rights Reserved.

Tuesday, December 05, 2006

Dog, Plank, Dog, Plank, Dog

In the category of “if you only have 10 minutes” yoga, I’d like to add a sequence that’s great for the abs and upper body. It’s sort of a yoga push-up without the push. The Dogs are (almost) the resting poses, and the work comes from the Plank and the movement between each pose. Try to move slowly and with control. It’s also a good series to pull out if you are feeling cold and sluggish; the Dogs will energize you and the Plank will get the heart pumping.
1. Adho Mukha Svanasana (Downward-facing Dog) Start the series in a well-measured dog. Begin in Balasana (Child’s Pose) with the arms stretched in front of you and then lift up to your hands and knees. Your outstretched arms should now be placed with the heels of the hands beneath the shoulders. Lift the hips up and back, with the knees bent to get the upper body aligned and then press the thighs back to begin straightening the legs. Don’t worry about pressing the heels to the floor--as you lengthen the backs of the legs the heels will start to sink. Hold for 5 breaths.

2. Plank Pose On the next exhale, slowly lower your hips so that the body is now in a straight line: ears-shoulders-hips-ankles. The heels of the hands should still be directly under the shoulders. Keep the neck long and the breath even. Don’t let the lower back sag or the hips lift up. Lower a knee if you need to support the lower back. The majority of the work in this pose will be in the chest and abdominal muscles. Hold for 5 breaths.

3. Urdhva Mukha Svanasana (Upward-facing Dog) On the next exhale, slowly lower your hips down until the legs are straight and the torso is upright. If this is too hard on your lower back, slightly bend the knees and rest them on the floor and uncurl the toes; the lower body is supported by your legs on the floor. Keep the neck long and open the chest by drawing your shoulder blades slightly together in back. The heels of the hands are still under the shoulders and you are pressing the hands evenly into the floor. Hold for 5 breaths.

4. Plank Pose On the next exhale, lift the hips back to the straight line and try not to drop the head. Hold for 5 breaths.

5. Adho Mukha Svanasana (Downward Dog) On the next exhale, lift the hips back to your Down Dog position. Try to lengthen the side ribs so that the arms are fully extended and the sit bones lift to the ceiling. Breathe deeply and don’t let the shoulders sag. Hold for 5 breaths then repeat the sequence at least one more time.

6. Balasana (Child’s Pose) Release onto the floor in a fully-supported Child. Rest your head on a block if your heart rate has come up and let your breath slow and deepen. Relax your arms alongside the body and feel yourself sink towards the floor. Hold the pose for as long as you like. ©Brenda K. Plakans. All Rights Reserved

Saturday, December 02, 2006

Lake Geneva Conference


Now we are digging out from the 6-8” of snow that dropped in southern Wisconsin early Friday morning. Luckily it is December, not March, so the snow is welcome and very pretty--an appropriate way to start this month.

That being said, it’s a little early to be longing for the warmth of spring, but I wanted to alert you to an event in May that requires some pre-planning. Yoga Journal is has now opened registration for its Lake Geneva conference being held May 4-7, 2007 at the Grand Geneva Resort in Lake Geneva, WI. The main conference is over the weekend, May 5-6, but there are various intensives offered on that Friday and Monday. I went two years ago and really enjoyed it. There are tons of classes with well-respected teachers such as Roger Cole, Sean Corne, Judith Lasater, Shiva Rea, David Swenson, Rodney Yee, and Patricia Walden, so you can sample a variety of yoga styles and teaching approaches. This year there seems to be more discussions on such topics as yogic philosophy, Hindu deities and vegetarian cooking, so you can exercise your brain, as well.

I recommend registering early (there’s an early-bird discount until the middle of March), because this conference attracts a lot of people from around the Midwest and fills quickly. If enough of my Beloit students are interested, we can register as a group (at least 10) and get a discount. Take a look at the conference details. I highly recommend this event and am planning to be there all weekend. Check it out!

Monday, November 27, 2006

FIGHTING A COLD WITH YOGA


‘Tis the season. The abrupt changes in weather, coupled with holiday stress and travel, make it the perfect time for getting a cold. You probably already have a few favorite remedies for the usual symptoms of runny nose, stuffy head, coughing, and weariness. There are also a few yoga poses you can add to the chicken soup and cough drops that help relieve some of these aches and pains.

Often a bit of gentle exercise will help move a cold through your system faster and make you feel better. The “neck-check” rule can help you decide whether to hit the mat or stay in bed; if the majority of your symptoms are above the neck (nose, sinuses, throat) moving around could help—below the neck (lungs, stomach, gut), you should just rest. Of course, if you feel completely crummy, sleep is probably the best remedy of all (or calling your doctor, but if you feel that bad you shouldn’t even consider yoga).

Here are some poses to try. Be gentle and always chose a supported version of the pose. Stay hydrated (hot water—“silver tea”—can be very soothing) and don’t practice for very long. Your system is still working to fight the cold germs and shouldn’t be overtaxed.

Yoga Poses for Colds


Adho Mukha Svanasana
(Downward –Facing Dog) - Believe it or not, this favorite pose can be very helpful when you have a cold. By inverting the upper body, you can release some of the pressure in the sinuses by helping them drain. If you’re head-achy, you can support your head with a tower of blocks or do the pose halfway on a chair and resting your head on the seat (come out of the pose if you feel dizzy). An even gentler version is to rest your hands on the wall at hip height and step back until your hips are over your ankles. Let your head hang down and release the upper back. Come out of the pose and into Balasana (Child’s Pose) and rest your head on a block or blanket.

Uttanasana (Standing Forward Bend)- If Dog feels like too much, just simply bending forward with the knees bent and hips resting on the wall can help release pressure in the sinuses and tension in the neck. If you want a little stretch in the legs you can slowly straighten them by pressing the backs of the thighs towards the wall. Bend your knees to come back to standing and unfold slowly.

Salamba Sirsasana (Headstand) - If you have a bit more strength, a modified headstand can really open the sinuses and also move the blood around to give you a bit more energy. Set the arms and hands in a tripod, as for your usual headstand, but once you place your head in the cradle of the hands, just walk the feet forward but don’t kick up. Concentrate on supporting the neck and head by pressing into the forearms and keep the breath even. When you are ready, fold back down to Child’s Pose.

Baddha Konasana (Bound Angle Pose) - If you’re congested, sometimes just a simple chest opener and focused breathing can help open the lungs. Sit in Bound Angle with the back against the wall and open your palms on your thighs. Press your upper arms to the wall behind you to open the chest. Close your eyes and count breaths—starting at 4, then counting each exhale down to 1 and repeating for as long as you like. You will help release tension in the back with the leg position and counting helps calm the mind so this is a very soothing pose. It may help you settle before going to sleep.

Savasana (Corpse Pose)-Like Bound Angle, Corpse is very calming and you can pile up blankets or pillows to lean against, so you aren’t flat on the floor. This is more comfortable if you are congested. Try to let your shoulders relax and open the arms to the side to get a bit of chest opening. The angle of the blankets and the open arms often allow some draining, which relieves pressure in the sinuses. Have tissue handy! ©Brenda K. Plakans. All Rights Reserved

Wednesday, November 22, 2006

Online Yogis

This past month, an extra-curricular activity of mine has been writing an article for Yoga Journal's online newsletter for teachers. It is called "Online Yogis: Expanding Your Teaching into Cyberspace" and it was published today. Here is the link (you will have to register to read it, but it is free and you can always unsubscribe when you are done).

I did a number of interesting interviews, and there is a lot to think about regarding the effect of the Internet on yoga. This is pretty much a how-to piece for setting up blogs and websites and there are some nice links to the sites of my interviewees. Give it a look.

Enjoy the holiday and try to stretch a bit in between courses. Supta Baddha Konasana (Reclined Bound Angle Pose) and Supta Virasana (Reclined Hero Pose) both aid digestion by stretching out the tummy. Just make sure you rest on a nice pile of pillows or blankets so you can really relax. And digest.

Happy Thanksgiving!

Sunday, November 19, 2006

Thighs of Relief…

I’ve been swapping fitness skills with a friend at the Y; she’s a physical trainer with tight hips and I’m a yoga instructor with (shall we say) loose hips. So we meet once a week to lunge and squat and lift for half an hour, and then we do Trikonasana (Triangle),Virabhadrasana II (Warrior 2) and Baddha Konasana (Bound Angle Pose) for another half an hour. It’s interesting to see how the practices differ because Connie’s workout is all strength and sweat and mine is intense and quiet. I think we’re learning a lot from each other and it’s made me especially aware of the thigh work involved in hip openers.

Actually, it’s made me painfully aware, so today I’m posting a series of stretches to help open up tight or overworked thighs. Try these after any running or walking or even yard work, to see how they can get the blood moving through tired legs.

Thigh Stretching Sequence

Sukhasana (Easy Pose) - Bring your awareness to your thighs as you sit cross-legged. Try to release any tension in the hip joints and thigh muscles.


Padangusthasana (Hand-to-Big-Toe Pose)-Lie on your back and breathe deeply into the back of the legs as you draw your foot towards you with the belt and press the back of the thigh away. Try to keep the pelvis balanced (there will be a curve at the lower back). Lower the leg to the side and rest the thigh on a block so you can concentrate on opening the hip joint instead of tipping over. Repeat on the other side.

Virasana (Hero Pose) - Lower your hips between your ankles (or onto a block), trying to keep the knees together. Keep the lower spine long and make sure the tailbone points down. Try to hold the pose for awhile and, if you can, lower your hips closer to the floor to deepen the stretch. This may work better with a folded blanket than a block under the hips. You could add a stretch to the arms, such as Namaste to the back or Gomukhasana (Cow’s Head Arms).

Adho Mukha Svanasana (Downward-Facing Dog) - Come onto your hands and knees from Hero and then lift up into Dog. As in Hand-to-Big-Toe, lengthen though the side ribs and press the thighs back. Don’t try to press your heels down; the pressing of the thighs back will eventually release the feet towards the floor.


Thigh Stretch at Wall- This is a pretty intense stretch, so move into it slowly. Come to your hands and knees, with the feet at the wall. Then bend one knee so it is on the floor and stretch your shin up the wall. You may want a blanket under that knee. Bring the other foot to the floor, start lifting the torso, and come to a mini-lunge at the wall. Lengthen the front of the wall hip to relax and open the thigh muscle. Hold for at least 10 breaths, and then switch to the other side.

Paschimottanasana (Relaxed Forward Bend) Come back onto the floor, with the legs in Dandasana (Staff pose) under a chair or stool. Relax the upper body onto the support of the chair and breathe into the stretch in the backs of the legs. Try to keep releasing the legs in this comfortable position and maybe you can fold further forwards.

Savasana (Corpse Pose) - Extend onto the floor and try and keep your legs and hips totally relaxed. Hold for as long as you like. ©Brenda K. Plakans. All Rights Reserved

Thursday, November 16, 2006

Of all the (synovial) joints in all the towns in all the world…

When the oil light comes on, it’s time to stop the car and call the tow truck. Driving without the proper amount of oil lubricating the engine means the car will soon shut down and repairs will probably be expensive. Unfortunately, we don’t have our own set of dashboard lights (where would they go?) to warn when vital fluids are low or cold or sluggish, but you get the message soon enough when you try to move or stretch without proper lubrication.

I want to talk about joints a little bit today…synovial joints. I want to talk about the connections between the various long bones in your appendages and the joints that allow you range of motion in your arms, legs, hips and shoulders. These hinges are key points in your mobility and keeping them flexible and healthy are important, especially as you age, so you can continue to reach up and bend over in your daily activities.


The diagram shows how these joints are constructed. The ends of the bones, connected by ligaments, are covered in a layer of cartilage to prevent wear and tear on the bones themselves. The joint is contained in a housing of synovial membrane that secretes the “oil” of the joint, called synovial fluid. This fluid is essential to the health of the joint; too little and the bones grind against each other and wear off the cartilage, too much from inflammation (or foreign material like pus or blood) can cause the joint to swell painfully. Even the natural settling of the fluid from non-use overnight can make you stiff until you start moving again in the morning.

For the most part, keeping your joints healthy and your fluids flowing is as simple as regular use (some forms of arthritis and other injuries heal with rest rather than use, so make sure your doctor approves of your regimen). One of the reasons yoga is such a great part of your routine is that is requires extensive work from all joints; you bend and flex in many directions that you wouldn’t during regular use, so the synovial fluid washes over all parts of the joint and is kept warm and moving. Various studies have demonstrated how exercise is beneficial to the overall health of these important hinges—although, if you are a regular practitioner of yoga you already know this.

During your next yoga sequence, pay special attention to the work and range of motion in your joints. Notice the directions they bend easily and be aware (and careful) of the ways the movement is more difficult. Whether bending forward in Uttanasana (Intense Forward Bend); extending the legs to the side in Trikonasana (Triangle); crossing the legs in Garudasana (Eagle); or extending back in Virabhasdrasana I (Warrior 1), you can’t help but marvel at the engineering of these hinges…and that’s just the hips. So be kind to them, use them regularly, and don’t bend them in the wrong direction. Here’s looking at you (and your joints), kid!
©Brenda K. Plakans. All Rights Reserved

Sunday, November 12, 2006

It’s Hip to be…Triangular

A pose that fascinates me is Utthita Trikonasana or Extended Triangle. It is such an odd position, and so unnatural, that it takes a long time for the body to remember how to do it. Feet turn at odd angles to one another, thighs roll out to keep the knees lined up with the shins, the torso tips to the side while trying to twist below the ribcage, the neck twists even more to look at the sky. Beginners usually don’t like the pose, at first, because it feels so ungainly and doesn’t make much sense. However, I have had a number of students with hip issues who are amazed at how nicely the pose stretches and opens that area of the body.

There is an extremely complicated explanation for what the various muscles of the hips and thighs are doing in this pose. To massively paraphrase H. David Coulter, in Anatomy of Hatha Yoga, “it puts unusual asymmetric tensions on the hip joints and muscles of the thighs”; in other words, because you are rolling the thighs out to keep the hips even and squared and then stretching to the side, there is a high level of engagement going on around the pelvis to keep you aligned, but also to keep you from tipping over. One side of the body lengthens into a stretch, while the other side tries to support the weight of the body and keeps you cantilevered over the floor.

I think it is a “magic” pose, because it does so much for the body despite the awkward arrangement of limbs to torso. You stretch the backs of the legs, open the hips, massage the torso with the twist, open the chest and stretch the lengthened arms. As your body becomes used to the position, you can also work on your breathing—trying to keep the breath full and even as you continue to subtly twist the center and stretch the extremities.


Here’s a short sequence to get you prepped for a nice, long triangle. Challenge yourself to stay in the pose for awhile, and notice what effect it has on your body.

Triangle Sequence
Sukhasana (Seated Easy Pose)
-Concentrate on lengthening the side ribs to create space in the lower half of the torso. Balance the pelvis so you are resting on the center of the sit bones, not rolling forward or back. Starting in the lower back, start twisting gently to the right, then move the twist into the rib cage then the shoulders. Hold for a few breaths and then repeat on the other side.

Dandasana with Namaste Arms (Staff Pose) Maintain the length you just established in the spine, while adding the stretch of the feet forwards and the arms behind the back in the prayer position. Keep the spine long and the pelvis balanced so the lower back doesn’t overarch or slump backwards. Stretch your elbows back and slightly down to open the chest.

Padangusthasana (Hand-to-Big Toe Pose) Concentrate on keeping the back of the hips grounded as you stretch the right foot towards the ceiling (the left foot stretches to the wall in front of you, as it did in Staff pose). Then lower the right leg to the side with the hips still evenly pressed to the floor. You are essentially in a reclined Triangle now. Open the chest, keep the pelvis level and press the souls of the feet away evenly. Repeat on the left side.

Tadasana with Hastasana (Mountain Pose with Overhead Arm Stretch) Come to standing, with the body aligned and the spine stretching up to the ceiling as the tailbone points down. Press the palms overhead, while keeping the shoulders away from the ears. Feel the stretch along the side body and the rotation in the shoulders.

Utthita Trikonasana (Extended Triangle Pose) Now, come to Triangle, emphasizing the work you’ve done in the previous poses. Feet are grounded evenly, the hips are square, the tailbone points down and the side ribs lengthen. As you start to lean to the side, begin the twist low in the back and then move it to the chest and shoulders. The arms stretch away from each other as you lower to the shin or thigh. Finally, the head turns to look at the ceiling as you keep your neck long. Keep adjusting the pose as you hold it and try to breathe deeply and evenly. Switch sides. ©Brenda K. Plakans. All Rights Reserved

Wednesday, November 08, 2006

Mind-Bloggling…

I just finished an article in this week’s New York Times Magazine (“Cyber-neologoliferation” by James Gleick ) about the compilers of the Oxford English Dictionary. This is a dictionary, in its third edition, that is trying to include every single written English word that has been in use for at least five years. This third edition may only ever exist on a computer, because the list is getting so long and the task of updating so demanding. (The second edition was 20 volumes long).

The article states, “Like the printing press, the telegraph and the telephone before it, the Internet is transforming the language simply by transmitting information differently. And what makes cyberspace different from all the previous information technologies is its intermixing of scales from the largest to the smallest without prejudice.” You can’t finish a list of English words, because new words are springing up faster and faster these days on the internet.

They are in the Ps right now.

If there was ever a case for needing to “be in the present,” it would be when you are compiling the Ps and know that any blog posting, any text messaging abbreviation, any YouTube video at anytime could be the source of the next really popular O word. I think it would be extremely hard not to get overwhelmed by the scale of it all. Keep your focus on your exhale…

I’ve been thinking about yoga online a lot lately and what the implications for the practice are. To me, yoga is a living language and is constantly changing and adapting depending on who is practicing, how it is being taught, what it is being used for. So if we start connecting yogis around the globe with the internet, how will this change yoga? Will we start moving away from an asana-based practice and start to work on the other limbs (Pranayama, etc.)? Will it become a more private practice, if you don’t go to a studio for class? More public, because you can connect with more people online? I dunno, but I love to think about it.

What do you think about it?
©Brenda K. Plakans. All Rights Reserved

Friday, November 03, 2006

The Why of Yoga...

So, we already know the benefits to a regular yoga practice—more strength and flexibility, better sleep, a clearer head, stronger immune system, lower stress, etc., etc. But, a good question is WHY does yoga and meditation give you these benefits? What chemical reaction is happening in the brain and muscles to create all this good feeling and better living?

Here’s a chance to listen to a clinical psychologist describe the latest research on the body’s physiological reaction to meditation. On Monday, November 7, in connection with Beloit College’s Buddhism at Beloit lecture series, post-doctoral fellow, Donal MacCoon, will be speaking about “Mindfulness Research: A Collaboration Between Science and Spirituality.” Mindfulness is an approach developed by John Kabat-Zinn; it combines aspects of guided meditation, yoga and awareness as a tool for stress reduction. Studies done at the Health Emotions Center at UW Madison have proven a connection between practicing Mindfulness and increased immune levels. This study was completed in 2003, so hopefully this lecture will discuss continuing research.

The talk will be held in Richardson Auditorium in Morse-Ingersoll Hall on the Beloit Campus, starting at 7:00p.m. I hope to see some of you local folk there! ©Brenda K. Plakans. All Rights Reserved

Thursday, October 26, 2006

The Bike and the Tree


Vrksasana (Tree Pose) is one of those poses that either you love or hate; obviously, the intensity of those feelings depends on how easily you can do the pose. Either you balance and can feel the alignment of your body from the sole of your foot through the top of your head, or you tip over as soon as one foot comes off the ground.

As a teacher, I find it a very compelling pose because the basic shape of the pose is easy for most students and, once they manage to balance—even for a few seconds, they get a great sense of accomplishment. It’s kind of like learning to ride a bike; when you finally figure out how to center yourself and balance it is an exhilarating and weightless feeling. Until then, you lean over, stumble to catch yourself and become frustrated. Here are your training wheels…

Vrksasana Prep
The most important part of the pose is finding your balance (well, duh, you say) but also finding the confidence to let go of your support and trust the alignment of your body and the strength of your legs.

1. Against the Wall-The easiest way to help yourself is to do Tree Pose with your back to the wall. At first, you will just rest your seat and back against the wall, with the heel of the foot a few inches from the wall, so that you can establish line up of the pose even though you are leaning. Try to ground evenly through the sole of the standing foot, but mostly just notice how the whole thing feels-hips even, knee stretched to the side, shoulders balanced over hips. Close your eyes and let your body feel the pose…the slight lean into the wall’s support should keep you standing.

2. Lifting off the Wall- Once the leaning position becomes comfortable and easy, try it with the heel about 5 inches away from the wall. Then press the fingertips to the wall at the hips and gently lift the hips and upper body away so you are balanced over the standing leg, but still feel supported through the fingertips. If you feel aligned, lift the fingertips off the wall for a few moments…or longer if you feel balanced. Let yourself rest against the wall if you start to feel wobbly, then realign and press away again.

3. Facing the Wall- By now, you should start to recognize the feeling of alignment and can turn around. This time, keep the fingertips on the wall about shoulder-height and come into the pose while facing the wall. You can lean into your fingers if the urge to tip comes over you, but keep trying to press your upper body over the lower so your weight is evenly distributed up and down the spine and onto the standing leg.

4. Side to the Wall
- When you are ready, and only if you feel confident—doubt will knock you over as soon as imbalance will—turn your side to the wall, so you can only place one hand on the wall. Come into the pose with this slight support and then try to lift the hand off the wall. By now, you should be familiar with the feeling of alignment and the solid pressure on the grounded standing foot. Try to recapture that feeling, with just the palm and then fingertips of one hand…and then no hand at all. Keep the pose under control and if you start to lean, rest the hand on the wall again until you feel stable.

Think back to how long some one had to run behind you on your bike until that day when s/he let go and you sailed off. And as you lift up and ground down, as you lengthen and balance, you can think grateful and thoughts towards the person who was behind you on that bike. I suppose you can think grateful thoughts towards the wall, too, but it’s not quite as inspiring. Either way, Vrksasana is a peaceful pose, once you master it, and is an appropriate dedication to someone (thing?) who has been a great source of support and confidence. ©Brenda K. Plakans. All Rights Reserved.

Sunday, October 15, 2006

Mirror, Mirror, On The Wall…


One of the reasons I prefer Iyengar yoga, and like to teach it, is that each pose is its own entity. You establish your correct position and alignment and then stay there, keenly aware of the work necessary to achieve the pose and the benefits derived from that work. You can’t use momentum or sneak out of the more difficult poses; it’s your mind and your muscles present in that particular moment. Of course, how do you know if you are in the pose correctly so you are helping your body, not hurting it? Well, first of all, you should try to have a class with a trained teacher every once and awhile so s/he can help you do each asana correctly. When you are on your own, here are a few tricks to doing your own adjustments.

Probably the easiest way to correct is in a mirror. Set up your yoga mat in front of the mirror so you can check your alignment, but still have room to do the full pose. Place yourself so you don’t have to crane your neck to see, which can alter your positioning. Once you have adjusted the pose, close your eyes and spend a few moments really feeling the pose—you won’t always have the mirror and you need to retain your sense of the pose and store it in your muscles’ memory. Things that are easy to look for include:

-Trikonasana (Triangle): from the side, check the squareness of the hips and the line-up of knee and top of foot
-Virabhadrasana II (Warrior 2): same as Triangle, also check the level of the arms
-Parsvakonasana (Lateral Angle): same as Warrior 2, from the front check for a straight line from ankle to wrist
-Any sitting pose: from the side you can look at the line-up of ears, shoulders and hips; from the front you can check to see if the hips and knees are level
-Forward bends: from the side you can make sure the spine is long and you are folding from the hip crease
-Twists: make sure the head is lined up with the tailbone and you aren’t leaning back, that the chin is parallel to floor

Another possibility, which usually requires an assistant, is to take a picture of yourself doing the pose. This doesn’t offer immediate adjustment possibilities, but with more angles to look at, you get a better sense of the whole pose (digital is semi-immediate). I present two versions of Uttanasana (Standing Forward Bend) as an example: In the first picture, you can see my hips are too far back which means I’m not grounding evenly through my feet. This lifts my hands off the floor and I’m also rounding my back slightly to help balance. In the second photo, I’ve brought my hips forward and now my hands can press to the floor so the arms are more engaged and my spine lengthens. I didn’t stage the first photo—after checking it on the camera, I realized what needed adjusting. I have to admit, taking a lot of pictures for this blog has made me very aware of the fine tuning required in even the most basic of poses!

While it’s important to check the accuracy of your poses, don’t get too bogged down in being “correct.” As you continue to practice, your body will learn where it should place itself and you will come to the position automatically and then do fine tuning once you are in place. This subtle work you do while in the pose is the essence of yoga; your awareness of your body in each asana in each specific moment. You won’t need a mirror to tell you who is the fairest in the land; you will know it in your heart. O Great Queen (or King)! ©Brenda K. Plakans. All Rights Reserved.

Sunday, October 08, 2006

Planes, Train and Automobiles


This weekend, Jim, Eamonn and I took a trip to the Illinois Railway Museum. Trains are very big at our house right now, and one of my students who volunteers at the museum thought E would enjoy seeing and riding on the real thing. As we clattered along the track in one of the interurban cars, I wondered what travel in one of these things would have been like in the 1930s. The bench seats were just a little bit more comfortable than a school bus’ and the windows were huge—nice for the view, but all kinds of grit would fly in in the summer. I suspect you would be very stiff and dirty after about 2 hours.

When travelling nowadays, while you won’t get a face full of soot, being stiff and cramped in close seating hasn’t changed much. So, I’ve put together a (mostly) seated practice that you can do to get the blood flowing whether you are on the move or are stuck at a desk all day. It doesn’t take much to reenergize the muscles and realign the spine, you just have to make a conscious effort to do so every hour. And, if boarding restrictions continue--no Cheez Whiz, by the way--stretching may be the only thing you can do on the plane beside watch last month’s movies!

Seated Stretches

Sitting Tall- If you don’t have room to sit cross-legged, scoot to the end of your chair so you can rest evenly on the sit bones and lift up with the top of the head. Lengthen the spine and line the shoulders up with the hips. Breathe for awhile in this aligned position.

Seated Dandasana (Staff pose)- In this variation on a forward bend, stretch your legs out so that the feet are flexed and you’re gently pressing the backs of the legs towards the floor. Make sure you don’t lock your knees—slightly bend them, if necessary. Keep the spine long and the chest lifted and fold forward from the hip crease. As you tip the pelvis towards the thighs, notice the opening in the backs of the legs.

Hastasana (Overhead arm stretch)- Come back to your seated position and stretch your clasped fingers towards the luggage bin (be careful not to hit the attendant button). Turn the palms up, press the shoulders down and lengthen the neck. Then, slightly bend the elbows, draw the palms farther back and try to straighten the arms again. Notice the deep rotation in the shoulder joints.


Gomukhasana (arms) (Cow’s head pose)- Release your arms down to the side, then bend the right arm overhead and reach up in back with the left hand and try to interlock your fingers. If the hands don’t reach, try and take hold of the back of your chair so you can anchor the pose. Stretch the elbows away from each other and slightly towards the center. Repeat on the other side.

Seated Twist- Keep the feet planted firmly and the hips stationary as you exhale and start to twist the torso towards the right. Use your hands on your legs or armrest to help deepen the twist. Slowly rotate the spine, starting with the lower back, then rib cage and finally shoulders and head so the twist moves from the least flexible part of the spine to the most flexible. Keep lengthening the neck and balancing the shoulders over the hips. Repeat on other side. You can use this pose to check out the offerings on the duty free cart or your seat mate’s reading material…

Trikonasana (Triangle)- If you have room, and can leave your seat, find a spot by the rear exit or near a galley to step into a quick triangle. The extension of the arms and twist of the torso feel great after sitting and the stretch in the legs helps prevent cramps. Plus, if it’s a long flight, there may be a beverage station so you can grab some juice or water to stay hydrated. Be careful not to block the bathroom door. Bon Voyage!
©Brenda K. Plakans. All Rights Reserved.

Wednesday, October 04, 2006

Parsvottanasana—not for wimps!

Last week, I taught a number of classes culminating in parsvottanasana (intense side stretch pose). It is not often a favorite, but it is one of those poses that are very efficient so you can do one as your 10 minute-work-out sometime when you are rushed. It’s even better when you take some time to work up to it, so that is my posting for this week. Give it, or one of the modifications, a try and notice the great stretch in the legs, opening of the chest and engagement of the torso muscles.

Parsvottanasana Sequence
-Tadasana (mountain pose): Start standing up and take some time to really ground through the soles of the feet, lengthen the side ribs and stretch up with the top of the head.

-Hastasana (overheard arm stretch): Stretch the arms to the side and then overhead, interlocking the fingers and turning the palms up. Keep the neck long and the shoulders down. When you lower the arms, try to maintain the lift in the rib cage without hunching the shoulders.

-Right angle stretch- Stand with the hands on the wall, or a chair back, hip distance apart, at hip level or a little higher (if your shoulders are tight). Step the feet back until the hips are directly over the ankles and the body makes a sharp right angle. Press your fingertips to the wall, press your sit bones away from the wall and enjoy the stretch up and down the sides of the body.


-Parsvottanasana Prep- Bend the knees and come to standing, but note where your feet were in the right angle stretch. Step your feet apart from this point, so your torso is that distance from the wall (maybe 3-4 feet). Now turn the wall foot towards the wall, your center foot slightly in and turn both hips to face the wall. Take a moment to really square the hips to the wall and lift up to the side ribs…

-Then, ground thru the back heel and gently press the back of the knee to the center of the room; press both sides of the front foot to the floor; and hinge forward from the hip crease, keeping the spine long. When the body is parallel to the floor (or however far you can come with the back long), stretch the hands out and press your fingertips to the wall to help balance the torso. Make sure the feet stay grounded and the hips square.


-Parsvottanasana (intense side stretch)-If you want to deepen the stretch, release the hands from the wall and bring them to Namaste behind the back (or cross the forearms at the lower back). Relax the spine and round down over the front leg, keeping the hips squared and the feet grounding. Then lift the spine back to parallel and then to upright. Turn the hips to center and release the arms. Come back to Tadasana and start the sequence for the other side…

Viparita Karani (Legs-up-the-wall Pose) - After all this work in the spine, it feels great to elevate the feet and let the weight of the legs gently press your lower back to the floor. Stay and long as you want and then lower the feet to a Baddha Konasana (Bound Angle) or Sukhasana (Easy pose) position. Roll to the side and come back up to sitting.

©Brenda K. Plakans. All Rights Reserved.

Monday, October 02, 2006

REMINDER...

Remember…it is very important that you always take time to arrange your props correctly. Especially in relaxation poses, so you can really release in their support. (Thank you, Milo for that demonstration…)


Tomorrow...Parsvottanasna!

Sunday, September 24, 2006

BREATHING WITH BUDDHA


I know, wrong religion, wrong god for yoga, but I wanted to give you some breathing techniques to try at one of the talks that are going on at Beloit College next week during the 5-day residency of the Tibetan Monks from the Drepung Loseling Monestary.
There are musical presentations, the creation of a sand mandala and lectures on meditation. I went to several meditations led by these monks at the Smithsonian Institution in Washington DC and it was a very moving experience; I highly recommend you come to one of the events.

The meditations I participated involved almost an hour of the drones and blasts of their various instruments, which gave me the giggles at first. Once I began to let the sound wash over me, the music and chanting became a place to focus my attentions and soon my breath began to slow and I was able to settle my thoughts. Here are a couple of breathing exercises that can help quiet the mind, whether you are in the presence of these calm, peaceful men or not.

“Loop” breathing and Exhale lengthening

For either exercise, find a comfortable position you can stay in for awhile—maybe Savasana or Sukhasana against a wall. You want to be able to release your entire body into the support of the floor or the wall so you can concentrate on your breath. Give yourself a few moments to really settle into your position and let the breath start to slow.

1. “Loop” breathing-Pay attention to the beginning and end of each breath. Notice how much “silence” there is at the end of each inhale and exhale; the moment when there is no breath at all. On the next cycle, try to imagine your breath as a loop and let the exhale begin as soon as the inhale finishes, so there is no stopping. This will be a bit jerky at first, especially between the exhale and inhale (it is easier to let full lungs empty than to begin filling them again). Imagine the cycle as an oval, with the transitional points at each end and visualize the breath moving smoothly around those curves during the transition. Continue this for a while (5-10 mins.) and then let your breath return to its normal pattern.

2. Exhale Lengthening-After relaxing with your normal breath, start to notice the length of each inhale and exhale and count the seconds. Are they the same counts or is one longer? Try to bring the breath to an even number of counts, so the in- and exhale take the same amount of time. After a few even breaths, try to add a single count to the exhales. Continue with that for awhile and then add another count. Continue with that and, after awhile, if it feels okay add another count so that the exhale is 3 counts longer than the inhale. Continue with that until you are ready to stop and let your breath return to normal, maybe giving a big sigh to break the counting cycle. Rest until you are ready to finish the exercise, than slowly roll to the side and push yourself up to sitting.

(If you are interested in more information about current research being done on the effects of meditation, this NPR article is a good place to start.). ©Brenda K. Plakans. All Rights Reserved.

Friday, September 15, 2006

TIME TO WALK THE PLANK (MATEY)…


In honor of Talk Like a Pirate Day (September 19) I want to focus this week’s posting on Plank Pose. Like Adho Mukha Svanasana (Downward Facing Dog) or Navasana (Boat Pose), Plank pose is an efficient, all-body pose that strengthens the arms, torso and legs. It’s not easy, but it is a good pose to drop into if you only have a few minutes to dedicate to yoga on a particular day (ouch, busy day). It is also very adaptable, so you can change the position of the arms and legs to make the pose harder, easier or just to change the emphasis. Here are some variations:

Variations for Plank Pose

Basic Plank: Set up in Table Pose as you would for Dog; heels of the hands are beneath the shoulders, knees are beneath the hips. From here, straighten the arms and stretch the legs out behind to bring the torso into a straight line from the ankles to the shoulders. Keep the shoulders away from the ears and the neck long. Notice the work in the torso--the abdominals do most of the work in this pose, more than the arms and legs, because they are responsible for keeping the spine long and the torso lifted. If your hips sag, or the body is bent, lower one or both knees to the floor, so that the abs are still engaged, but you can lengthen the back. Try to hold for 5 breaths and work up to 10.


One-Legged Plank: In this version (in keeping with the Pirate Day theme), come into the Basic Plank and then lift one heel. Keep the weight balanced between both hands and stretch out thru the lifted heel. This requires even more work from the torso, so don’t try it if you need do the Basic Plank with one knee on the floor.

Tripod Plank: Make a tripod by interlocking the fingers, bending the elbows and resting the forearms on the floor with the elbows under the shoulders. Then lift the torso and straighten the legs. This version works the upper chest and triceps.


Ball Plank: If you want to take your Plank to an even more challenging level, try it on an exercise ball. Come into the Basic Plank with the legs resting on the ball, and walk your hands forwards until the lower shins and ankles are on the ball, while the shoulders are over the wrists. Notice how you have to engage the side body to keep your balance on the ball—this is in addition to the work that keeps the hips lined up with the legs. Arrgghh!
©Brenda K. Plakans. All Rights Reserved.

Friday, September 08, 2006

LEARNING TO LOVE THE DOG

After class last week, a couple of my students were discussing how much trouble they had with Adho Mukha Svanasana (Downward-Facing Dog) and decided that they just didn’t have the upper body strength for the pose. This is a common problem for people with stiff shoulders or upper backs; the pose becomes a version of Plank Pose, because they can’t lengthen the upper torso and rotate their shoulders enough to get into the inverted V of Dog. All the weight of the upper body is on the arms and wrists, instead of being equally suspended between the legs and arms. This is a very strenuous position and, because of the strain, people stop breathing evenly and blood starts to rush to the head. Needless to say, this does not make for a very calming pose.

So, in honor of Madame Purl and Dan, I offer this sequence for shoulder opening. Be honest with yourself and don’t overdo any of the stretches or force your body out of alignment. The idea is to work on the rotation of your shoulders and find a place where you can feel the upper back working, while the spine is still lengthening. Even if you don’t have trouble with your Dog, this is a wonderful series to work any tension out of your upper torso and will help you stay in DFD even longer to get the maximum benefits of the inversion. Enjoy!

Shoulder Opening Sequence

Tadasana with Hastasana Arms (Mountain Pose with Overhead Arms) Extend the spine and side ribs as you stretch your palms towards the ceiling. Keep the neck long and the shoulders away from the ears. If you need to slightly bend the arms to stretch up, do so.

Extended legs with Gomukhasana (Cow’s Head Pose) Arms Step your feet apart as if for Triangle, and ground evenly thru the bottoms of the feet. Lift the side ribs, but keep the shoulders down. Twist lift the right arm overhead and bend the elbow while reaching up the back with the left hand; join hands or clasp either ends of a belt. Stretch the elbows away from each other, while gently pressing them to the center. Switch sides.

Parsvokonasana (Lateral Angle Pose) Do this combination Warrior 2 (legs)-Triangle (side stretch) Pose. Ground evenly thru the soles of the feet, but really focus on lengthening the side ribs as you stretch from wrist to ankle on each side.


Right Angle to the Wall Stretch Stand with the hands against the wall, even with the shoulders, and the step the feet back until your head, arms and side ribs are in a straight line. Press the finger tips to the wall as you stretch your sit bones back to lengthen the sides of the torso. To deepen the rotation of the shoulders, relax the upper back and let the head hang between the arms.**Is it just me, or do toddlers act just like cats when they get around a yoga mat?**

Vrksasana (Tree Pose) With the wall in reach (or against your back), move from Mountain in this balance pose (one knee bent, sole of that foot against the other leg). When you feel balanced, reach both arms overhead and repeat the stretch of Hastasana while keeping the shoulders down. Change sides.


Tripod Shoulder Opener Form a tripod with the elbows, sides of the arms and sides of the hands (fingers clasped or fingertips pressing together). Press the tripod to the wall at shoulder height and step back until you can hang your head between your hands. Feel the stretch around the shoulder blades and in the armpits.


Modified Adho Mukha Svanasana (Downward-Facing Dog) Start on your hands and knees, with the heels just a few inches from the wall. As you come into Dog, keep your knees bent and let your heels rest again the wall. Make sure your arms are stretched out enough that you can really lengthen the back and side ribs. Don’t worry about straightening the legs. Try to keep the neck long and the shoulders away from the ears (same positioning as the Right Angle Stretch).

Balasana (Child’s Pose) Relax on the floor and concentrate on releasing thru the shoulders.

Full Adho Mukha Svanasana (Downward-Facing Dog) Come away from the wall and do a complete Dog. Keep the knees bent and the heels off the floor if you need to—you are focusing on the work of the arms and shoulders this time. If you get the upper body in a comfortable, rotated place you can try lengthening the back of the legs, but only if you are comfortable.

Balasana (Child’s Pose) Again, come down to the support of the floor. If you want to roll over into Savasana (Corpse) for a more complete relaxation, go ahead and do so. ©Brenda K. Plakans. All Rights Reserved.