Sunday, September 03, 2006

QUEEN OF ALL ASANAS


I sort of left you dangling last week, without any lead-in to doing Shoulder Stands, so I thought I would give you a solid, chest-opening sequence leading to the Queen of all yoga poses (so they say).

Setu Bandha Sarvangasana is, both an intense inversion but also a calming, relaxing pose. Once you find your balance and stretch your feet overhead, the blood flow increases to the brain and the lower body is released from its usual fight against gravity. If you line your head up properly and let the weight of the body settle on the shoulders and upper arms, it is a very soothing position that feels great for the back, feet and legs—especially at the end of the day.

Let’s move into this beneficial pose slowly, and I’ll give you several modifications if you don’t feel ready to try going all the way into the position:

Setu Bandha Sarvangasana Sequence
Sukhasana (Easy Pose)-Study the alignment of the torso, so you will be able to recreate it upside down. Lengthen the side ribs, so there is space between the bottom of the rib cage and the top of the pelvis.

Dandasana, with Namaste hands in back (Staff Pose)-Press the sides of your feet against a block and press the backs of the legs to the floor. Keep lengthening through the side ribs as you bring your arms behind your back—either just crossed at the lower back, or palms pressed together with the fingers pointing down or (most challenging) up. You are in an Un-inverted Plow Pose.

Virasana with Gomukhasana arms (Hero pose with Cow’s Head arms)-Sit with a block or folded blanket between your heels, so you can keep the spine long as you sit back. Breathe into the stretch on the tops of the thighs and to release the hip joints. Then, use the belt, if necessary, to help bring your hands towards the spine in back, while stretching the elbows away from each other.

Tadasana (Mountain Pose)-As you did in Easy Pose, take a moment to really deepen the alignment of the whole body, especially the chest.

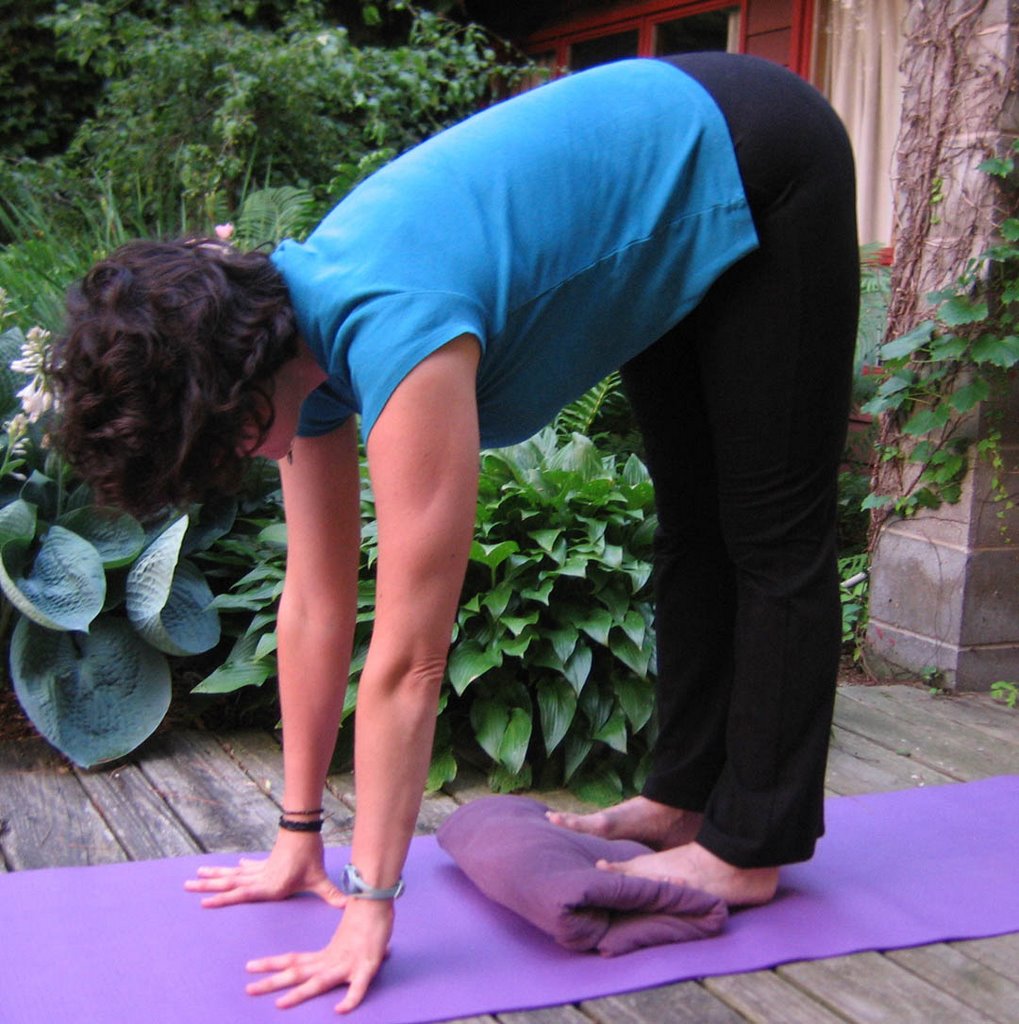
Uttanasana (Intense Forward Bend)-Keep the length in the side ribs as you fold forwards from the hip crease to reach a block or the floor. Try to recreate the alignment of Mountain with the upper body.

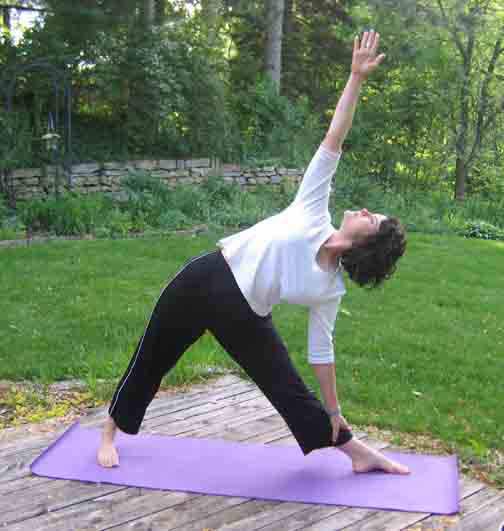
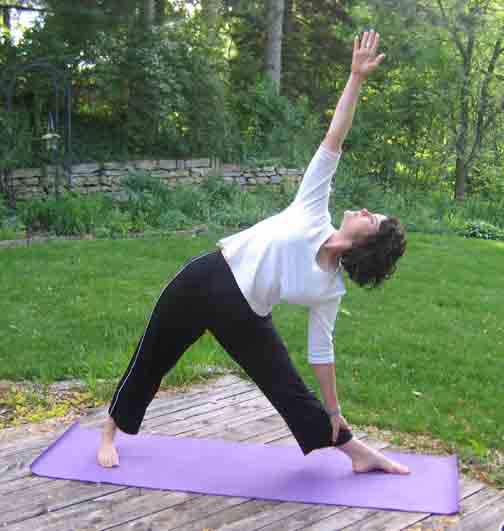
Trikonasana (Triangle Pose)-With the arms stretched to either side, notice the openness of both the front and back chest. Try to maintain this openness as you stretch out over the right leg, while keeping the hips facing forwards. Repeat to the left.

Setu Bandha Sarvangasana (Shoulder Stand)-There are a couple of approaches to this pose, so you can decide which is most appropriate for you…once in the pose, stay as long as you like, but always keep the spine aligned and the chest open. Breathing should be easy and relaxed; if the neck and chest feel crowded try to lengthen the side ribs and keep the back of the neck long (don’t look at your chest).
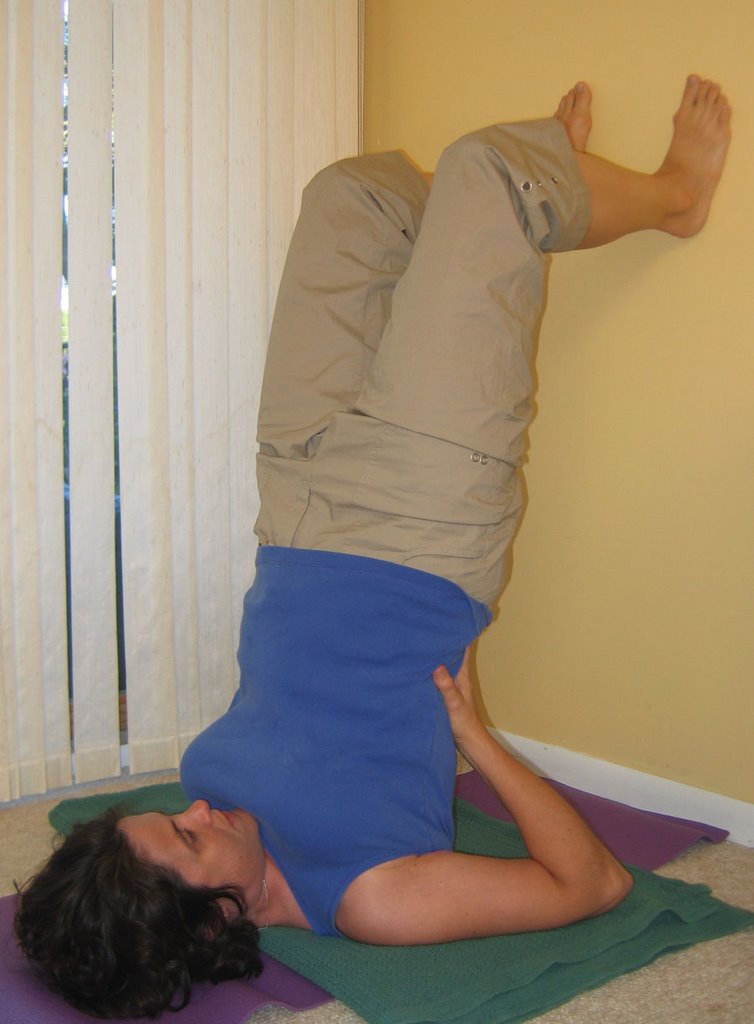
1. From Viparita Karani (Legs Up the Wall Pose)-Lie on the floor next to the wall, so that the backs of your hips are against the wall and your legs stretch up the wall over the hips. Your blanket is folded under the shoulders so that your head and neck rest on the floor; this is so you can keep the body’s weight on the shoulders and upper arms. Bend your knees and press the soles of the feet to the wall as you begin to lift your hips. With the upper arms close to the side ribs, bend the elbows and press your hands to your lower back to help lift. Make sure the shoulders are rolled under as you press your hips up until they are lined up with the shoulders (as you did in Staff pose). You can stay here, or if you are ready, straighten one leg and then the other away from the wall into Shoulder Stand. Slowly lower the hips and release the hands, then lie on the floor with the knees bent when you come down.

2. From Halasana(Plow Pose)-Lie down with your shoulders on the blanket, head off, about 3 feet away from the wall. Roll the hips and legs up and back—as if doing a backwards summersault—until the feet come to rest on the wall. Roll the shoulders under, lengthen the side ribs and lift the hips so that they are even with the shoulders. Keep the upper arms close to the body and bend the elbows so you can help lift the lower back with your hands. When the torso is aligned, press the feet to the wall and press the backs of the legs to the ceiling; enjoy Plow Pose, which is basically an upside-down Staff Pose. When you are ready, lift one leg and then the other, so the ankles-hips-shoulders are all lined up in Shoulder Stand. Slowly lower the hips and release the hands, then lie on the floor with the knees bent when you come down.

Supine Twist-When you are ready, bring the knees to the chest and then roll both knees to one side as you ground the back of the shoulders to the floor and stretch the arms to the side. Look towards the opposite shoulder from the knees, if you want a deeper twist in the upper back. Repeat to the other side.

Savasana (Corpse Pose)-Release the knees and stretch your legs out. Take a minute to realign your whole torso, so the neck is long and the head is lined up with the tailbone. Sink into the support of the floor and concentrate on letting all muscles relax.
©Brenda K. Plakans. All Rights Reserved.

p.s. The test has now concluded…I missed my old title, so brought it back with “yoga” included, so it would be easy to search for by theme. The address is still the same, so if you bookmarked it, that isn’t affected.

Wednesday, August 30, 2006

THIS IS ONLY A TEST...

I am experimenting with a new blog name--Yoga Dose (as in a prescription for stretching and relaxing)--to see if it is easier for people to find me. The address is still the same, only the title is changing (for now). Let me know what you think!

Stayed tuned for a Shoulder Stand sequence on Friday...

Friday, August 18, 2006

YOGA ON THE BEACH


Eamonn and I had a great time this past week, splashing in the warm waters of Holden Beach, NC. The few rainstorms we encountered just encouraged more naps and movie watching (Rosemary’s Baby, The King of Comedy, episodes of Strangers with Candy) and we only saw two jellyfish—there is a good chance one was just an empty sandwich bag. Jeff (the friend with the birthday) was a brilliant social chemist and the mix of personalities was dynamite.

One thing most of the guests had in common was an interest in yoga, so we had several classes on the beach. (The guests that had no interest were greatly amused at the response to this class by other beach goers—mostly curious smiles). We did the following sequences:

Work for the Abdominals

Sukhasana (Seated Easy Pose)-Concentrate on lengthening the side ribs to create space in the lower half of the torso. Balance the pelvis so you are resting on the center of the sit bones, not rolling forward or back.

Hastasana + Dandasana (Overhead Arm Stretch and Staff Pose)-Maintain the length you just established, while adding the stretch of the feet forwards and the arms overhead. Keep the spine long and the pelvis balanced so the lower back doesn’t overarch or slump backwards.

Cat Stretch-Start by lifting the tailbone towards the sky and let the arch move through the spine until you are lifting the head. Then point the tailbone down and open the back of the spine until the head drops forward. Repeat, slowly.

Bhujangasana (Cobra)-Use the palms on the ground as a support, but don’t push the chest up; let your back muscles do the lifting. Repeat, and this time you can use your hands to push the chest up and get a deeper stretch in the spine. Keep the hips pressed to the ground.

Salabhasana (Locust)-Deepen the work of the back by lifting both the hands and the feet off the ground. Keep the neck long and the shoulders away from the ears.

Tadasana + Gomukhasana (Mountain and Cow’s Head Arms)-Stand up to give the back muscles a rest and do a little chest opening. Try to press the elbows back and towards the center to deepen the rotation in the shoulder joints.

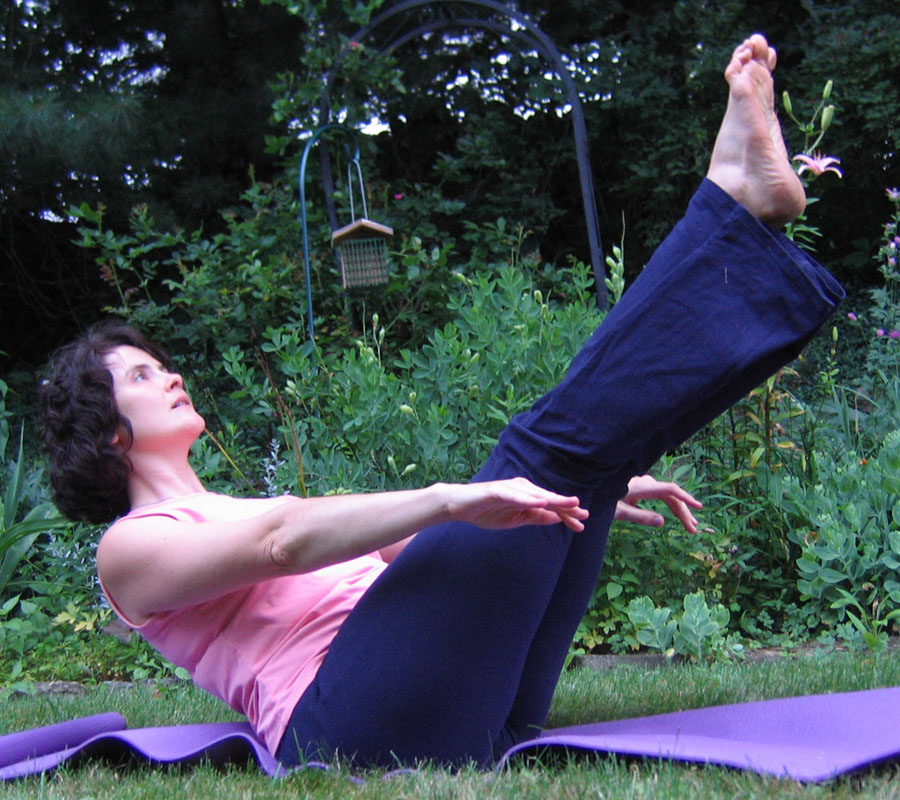
Navasana (Boat Pose)-Come back to the floor and try and hold this intense pose (see July 10) for at least 10 breaths.

Sukhasana with a twist-Release your abdominals by adding a twist to this seated pose. Let your exhales help you deepen into the twist, as you lengthen the spine by grounding through the sit bone and lifting the top of the head towards the sky.

Standing Poses

Tadasana+Hastasana (Mountain and Overhead Arm Stretch)-Align in this standing pose and keep the lower back in neutral as you lift the palms towards the sky. Standing will make this a more energetic pose, so be sure to keep your breath even.

Trikonasana (Triangle)-With your attention in the side ribs, try to keep both sides long as you fold over the right leg first. Repeat on the left side.

Virabhadrasana 2 (Warrior 2)-Try to bring the right knee to almost a 90-degree angle, while keeping the head lined up with the tailbone. Make sure the knee stays directly over the right ankle. Change sides.

Parsvakonasana (Lateral Angle)-Keeping the stance you established in Warrior, now fold over the bent right leg and rest the forearm on that thigh. Try to make a straight line from your wrist to ankle by keeping the 90-degree bend in the right knee. Repeat on the left side.

Flow of the following three poses-Use feedback to improve each successive pose—keep the side ribs long, keep the knee over the ankle, keep the hips level—as you flow from Triangle to Warrior to Lateral Angle on each side.

Tadasana+Gomukhasana (Mountain and Cow’s Head Arms)-End with the same quiet energy that you started with, this time by stretching out the chest and shoulders. Pause for a moment in Mountain with your eyes closed and notice what muscles were worked by these poses.

Now, open your eyes and go jump into the ocean (beware of any beached Ziplocs)! ©Brenda K. Plakans. All Rights Reserved.

Friday, August 04, 2006

SUNSHINE ON MY SHOULDERS...

It’s been awhile since I’ve included an actual sequence in my posting, so this week I decided to focus on a favorite series of poses, shoulder-openers. The poor upper back—it often bears the physical manifestations of our mental stress, such as tight shoulders, stiff necks and slouched postures. In June, I discussed how sitting tall and breathing can be relaxing, but here are some poses you can also do to open these areas and relieve some of the tension. They are especially nice at the end of the day.

Shoulder Opening Sequence

Sukhasana-Sit with the spine completely aligned and let the breath help you release any tension you are holding in your shoulders. Notice how the shoulders start to drop away from the ears as the neck softens and you settle into the pose.

Neck stretch-With the torso aligned, let the weight of the right hand anchor the body as you gently stretch your head to the left, lengthening the muscles along the side of the neck and top of the shoulder. Gently use pull the head farther left with your left hand on top of the head. Then, rotate your head slightly forwards so the stretch moves into the upper back. Change sides.

Hastasana-Keep the shoulders away from the ears as you lift your arms overhead. After your initial stretch, bend the elbows slightly and let your palms come further overhead to deepen the rotation in the shoulder joints. Try to straighten the arms. To stretch the legs, sit in Dandasana (Staff Pose) or Virasana (Hero Pose).

Balancing Cat-On all fours, stretch to opposite right hand and left foot away from each other, making a straight line from the fingers through the torso and to the toes. Lower that arm and leg. Now switch hands and legs. This engages muscles in both the front and back body.

Salabhasana (Locust Pose)-Let your inhales help you as you lift the palms and the soles of the feet off the mat from a prone position. This increases the work of the torso, because the muscles of the rib cage help you lift. Keep your awareness in the muscles on either side of the spine and lengthen the neck as the fingers and toes stretch away from each other.

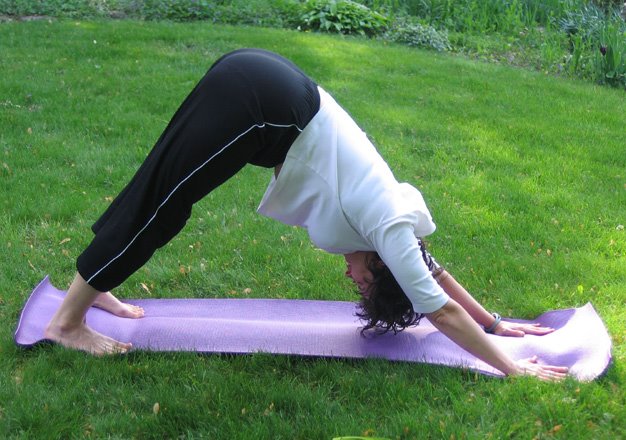
Adho Mukha Svanasana (Downward Facing Dog)-This pose is sort of the opposite of locust, because now you are grounding through the hands and feet while lifting the tailbone up. Enjoy the stretch in the shoulders and backs of the calves. To deepen the rotation of the shoulders, you can rest your heels against the wall, about 4-5” above the floor, and let the front of the body sink a bit deeper.

Balasana (Child’s Pose)-Come down to the floor from Dog, but keep the hands stretched out in front of you at first. Press the tips of the fingers to the floor and lift the palms of the hands—notice the stretch behind the shoulder blades. Then rest the hands on the floor, or relax the arms along side the body.

Viparita Karani (Legs Up The Wall Pose). Lie on the floor with the backs of your legs and hips resting against the wall and the feet lined up over the hips. Feel the pressure draining out of your feet and ankles. Keep the spine long as you relax the back into the support of the floor. Stay in this relaxing pose as long as you like.


This is going to be my last posting for a couple of weeks, because I’m going to in North Carolina. My friend, Jeff, is celebrating his 40th birthday by renting a beach house--so Eamonn and I are going to join him out there for a vacation. Rough, isn’t it? (Well, turning 40 is, but sunning ourselves on the sand is not) Hopefully, all tropical storms, heat waves and jelly fish decide to leave us alone.

While I’m gone, think about what sorts of poses and discussions you’d like to read about on this blog. Do you want more general sequences for home practice? Specific poses for different muscle groups? I haven’t heard much from any one out there and would like some feedback. If you’re shy, don’t worry, I have the comments section set up so I read any messages before they are posted and can delete those you don’t want published. Let me know what you think and if you have any requests.

Stay cool (as if that’s ever in question) and I’ll be back in a few weeks!

©Brenda K. Plakans. All Rights Reserved.

Thursday, July 27, 2006

THE SECRETS TO SEQUENCING (PART TWO)

(This week, my digital camera is on a field trip to Madison, taking pictures of rocks for a geologist. In order to stay on schedule, I’m going to post this without pictures and will try to add some visual information this weekend. Sorry-bkp.)

I sort of left you hanging last week, with only the upper part of your body warmed and stretched. However, I didn’t want to have a gigantic blog entry and overload you with information. Now we’re ready to address the lower back and legs, which are the main supporters of all the standing poses (i.e. Trikonasana-triangle pose, Virabhadrasana-warrior poses, etc.).

A good place to start bringing awareness to the large muscles of the legs is Dandasana (Staff pose). The pose is relatively simple, sitting with the spine aligned and the legs extended, but an engaged Staff gets blood flowing into the legs and energizes the torso with the effort it takes to sit tall and ground through the back of the legs. If you combine it with an arm stretch (Hastasana-overhead arm stretch, for example) it becomes a very active way to work most of the muscles at once.

I usually include Padangusthasana (Hand-to-Big Toe Pose) at the beginning of class because it opens the back of the legs (hamstrings in the thighs and the gastrocnemius of the calf). As you lie on the floor, concentrate on maintaining the lumbar curve in the lower back (about enough space for your fingers) and ground down through the back of the hips. This keeps the pelvis level and increases the stretch in the back of the thighs. As you lift one leg, make sure to keep the leg on the floor as engaged as the leg that is stretching; this will increase the stretch and keep you balanced when you open your foot to the side. Give yourself time to open in this pose; this is one you don’t want to rush (as if any of them are), because the more you ease into it, the more length you will get out of your legs.

A combination of the two proceeding poses is Paschimottanasana (Seated Forward Bend). In this position you keep the spine long as in Staff, while stretching the soles of the feet evenly away from you and grounding the backs of the legs as in Hand-To-Big-Toe. Bend at the hip crease, where the thighbone connects to the pelvis, instead of rounding the lower back. There isn’t a lot of forward movement in this stretch, but if it follows Hand-To-Big-Toe, you will notice more length in the back of the legs. If your lower back is flexible, you can eventually let the spine soften and round toward the legs into a more supported stretch.

The front of the thigh (quads) is the focus of Virasana (Hero Pose). Give yourself some help by lifting the sit bones with a folded blanket or block. It is very difficult to actually sit on the floor between the heels and often people let the lower back round in order to do so. Avoid this temptation, and notice how much taller you can sit if you lift your seat a bit. Try to let your exhales release the muscles in the hip joints, which will also let you lengthen the spine.

One last area to focus on is your back. Many of the seated positions require work of the abdominals in the side body to keep the spine aligned, but a little attention to the muscles running along side the spine will prepare you for later twists like Parsvakonasana-(Lateral Angle) or Marichyasana (Seated Twist and Forward Bend). Bhujangasana (Cobra) and Salabhasana (Locust) are baby back bends that open the chest while working the back muscles to lift the upper torso and, in the case of Locust, the legs. You can try various modifications to make them easier (using the hands to support the chest in Cobra or keeping the arms to the side in Locust) or harder (crossing the arms at the lower back for Cobra or lifting the arms out to the front in Locust), depending on your target pose.

Take to time to prepare yourself for your later, more challenging poses. The more work you do on the floor, the more confidence you will have when you come to your feet or hands or head (!) in the center of the room. These preparatory poses have their own integrity and, if practiced with a quiet focus, are beneficial even if they don’t lead to something more difficult. Some days you want to shake and sweat; others you just want to quietly extend. And no matter what, always give yourself a few moments for a complete relaxation at the end of your practice so that your body has a chance to recuperate and release. Namaste (said with an enthusiastic exhale, because that was a lot of information to get through!)
©Brenda K. Plakans. All Rights Reserved.

Thursday, July 20, 2006

THE SECRETS TO SEQUENCING (PART ONE)

One of, if not the, best part of taking a yoga class is letting yourself be lead through a series of poses that progress logically so that by the end of the session your body is completely worked and refreshed. An asana sequence is most successful when it teaches you the various elements of your target pose, but lets each step of the way challenge your body to stretch and open to its fullest. When you reach the peak of the class, your muscles and limbs naturally accept the challenge of the headstand, backbend, etc. because they have been properly prepared.

As you become more familiar with the many of positions in hatha yoga, you will begin to see the connections between them and this will help you develop your home practice. However, until all the Sanskrit names become second nature to you, I want to suggest ways of linking warm-ups and poses so you can start sequencing on your own. Even if you read this blog to get ready-made home practice sequences, you can use this information for a quick “spot stretch” --to loosen a cramped shoulder or stretch a tight calf muscle.


Try and start with a short meditation, or few minutes of focused breathing. This can be while you are standing in Tadasana (Mountain) or sitting comfortably cross-legged in Sukhasana (Easy Pose). Let your mind release, focus on the breath and take some time to align and open the spine.

From the breath and the spine, move your attention into your upper body. Consider what your target pose is going to be and think about what you need to prepare. Backbends and Shoulder Stands need warmed shoulder joints and an open chest. Headstands need energized arms and a long spine. Standing balance poses need a lifted rib cage and squared hips. Evaluate the work of the asana and what muscles are most engaged (what is sore when you finish the pose?) and work backwards to what preparations warm and stretch those parts of the body.

Hastasana (overhead arm stretch) is always a good place to start, because you get the whole torso into the act. The shoulder joints are intensely rotated, the sides of the chest stretch to keep the spine long and the hips have to balance to keep the tailbone pointing to the floor. This stretch can happen while you are standing or in Virasana (Hero), Dandasana (Staff) or Sukhasana. Make sure to keep the neck relaxed, the shoulders away from the ears and breathe evenly.

Another option is using the arm position from Gomukhasana (Cow’s Head). This requires even more rotation in the shoulder joints, while it stretches the triceps in the upper arms and opens the chest. Try to focus on the opening of the shoulder joints and keep the neck and upper back relaxed. Also, keep the spine long and the lower back neutrally curved; it’s easy to arch when you are so focused on the arms. The arm position for Garudasana (Eagle Pose) also opens the shoulders and upper chest, but moves the stretch to the center back as the arms twist at the center front.


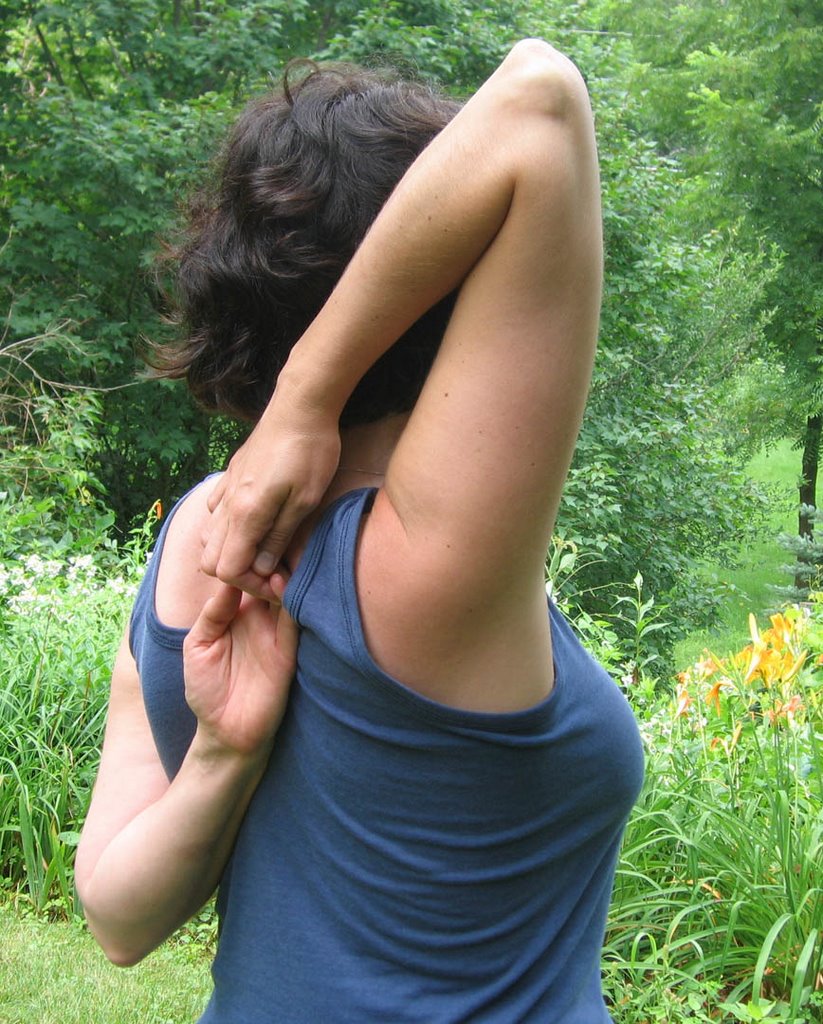
If Cow’s Head and Eagle are too pretzel-y for you, the Namaste hand position in back, also opens the chest and rotates the shoulders more gently. Work to deepen the stretch in the armpits by keeping the neck long and stretching the elbows down and back, as you press your palms together behind the shoulder blades. Keep your breath even, but notice the extra stretch you can sneak in by filling the lungs and lifting the rib cage on your inhales. Tricky.

Now the upper body is warm and open. You can come back Sukhasana and notice how you feel, compared to when you started. Store those observations because they will help you remember what stretch affects which muscles. This information is what will help you decide how to sequence your practice.

Next week, I’ll continue onto the hips and legs so you can develop well-rounded sequences. Until then, keep these warm-ups in mind during your next yoga class and notice which ones are echoed in the more difficult poses. And enjoy letting your teacher do the heavy thinking…


Monday, July 10, 2006

DROP AND GIVE ME 10


As much as we would like to, very few of us have time for more than one or two hour-long yoga classes a week. I’ve found that if I can slip into a yoga pose here and there for 5-10 minutes, whenever I think of it, I can get most of the benefits of the pose even in that short time. Of course more intense poses like headstands and backbends need a bit of preparation, but favorites like Dog and Triangle are easy to do wherever you have about four feet of room.


I have been working on my abdominal strength this summer, so one pose I often drop into is Navasana, or Boat Pose. It engages the rectus abdominis (six-pack muscles) to lift the spine; transverse abdominis and obliques (side and back stomach muscles) to keep the chest lifted and the back long; ilipsoas (muscles that connect pelvis to thigh bones) to keep the pelvis tipped; and the rectus femoris (one of the quadriceps muscles on the front of the thigh) to keep the thighs lifted. It is like one, gigantic sit-up without the movement.

Give Navasana a try, using any of the modifications to make it a more effective pose for you. I guarantee pretty quick improvement, if you manage to “drop in” to the pose a couple times a day.

Navasana (Boat Pose)

1. Sit on the floor with your knees bent and the feet flat on the floor. Tuck your hands under the knees and align your back by lifting the breastbone. Keep the neck long, but don’t tense the neck or the shoulders.

2. Start tipping back onto the base of your sitbones and lift your feet off the floor. Always maintain the lift of the breastbone. Find the place where you can balance on the sitbones without wobbling.

3. When you feel centered, begin to extend the knees until the calves are parallel to the floor and your thighs are about a 90-degree angle from the torso. Straighten the arms while lifting the breastbone.

*Just getting into this position may be enough for a beginning student and you should just focus on staying put and breathing, until you can hold this preparation pose without too much effort for a minute or so. *

4. To deepen the work of the torso, continue straightening the legs with the feet extended (but don’t point the toes). Keep the hands behind the knees or double your belt and wrap it behind the thighs so you can keep the torso long and the breastbone lifted as you extend.


5. Release the hands and turn the palms towards the floor. Keep lifting the breastbone, keep lifting the breastbone, keep lifting the breastbone. Don’t let the chest collapse or the lower back round toward the floor—the spine is loooong. Try to keep the breath moving evenly through the lungs, with an emphasis on longer exhales (this works the abdominal muscles even more). Try and hold the pose for a minute or two.

6. A nice release for this pose is to turn onto your tummy and lift up into Locust Pose (Salabhasana). Lie facedown, with the arms alongside the body with the palms turned up. On an inhale, lift the hands and the feet up, using the muscles of the back body so that the chest and legs come off the floor. Try to hold it for a few breaths and then relax back into the floor.
©Brenda K. Plakans. All Rights Reserved.

Tuesday, July 04, 2006

Breath and the Ball Gown


Several lifetimes ago (I mean professional lives, not karmic ones) I was a volunteer costumer at the University of Texas opera department where I spent many hours crouched over a sewing machine, hemming gigantic ball gowns and rushing to meet deadlines. This led to a very snarled up right shoulder, so I began getting regular massages to work out the kinks. The masseur worked with my sister at a local bakery, so he was very good at kneading…he also had some great advice. He suggested I tape a post-it to my sewing machine with a single word, BREATHE, written on it. It was a wonderful reminder to slow down, sit up and relax; it didn’t cure my shoulder completely, but it certainly helped.


I’ve been writing about fine-tuning poses, but one thing I always come back to in my yoga classes is the importance of aligning the spine and allowing the breath to release any tension in the back and shoulders. It seems like a simple exercise, but it is very easy to forget your posture when juggling the demands of the day. Just now, take a second to notice where your sit bones are in relationship to your hips/shoulders/ears. Line each of those landmarks up and notice how much taller you are and how much more space is in the chest. Now take a deep breath and let the shoulders drop away from the ears and feel the neck lengthen. You should immediately feel a bit calmer and more comfortable; that extra gust of oxygen in the lungs is a power force that can instantly start lowering the blood pressure and releasing tensed muscles.

Try to take advantage of this force every time you start to feel slouchy, tired or grumpy. The full lungful of air helps clear the mind and the tall spine allows the newly oxygenated blood to circulate freely throughout the torso. I can’t promise that you will immediately jump up and save the world (or meet your deadline, or finish the soprano’s gown), but you will be more focused and can clearly deal with the task at hand. BREATHE.

3-Part Breathing

This is one of my favorite breathing exercises. It can calm you in a tense situation. It can help you to settle down and go to sleep. I’ve even used it to pre-empt an asthma attack.

1. Find a comfortable position so that every part of your body is supported. You can be sitting upright in an over-stuffed chair or lying on the floor. Just make sure you can completely release yourself into the surface you are resting on. Take time to find this released point, so you no longer need to think about any part of your physical body. Close your eyes.
-Some meditation practices recommend covering the eyes with a gentle weight, such as a folded towel or beanbag, as the gentle pressure can be very calming. Give it a try if you are having trouble quieting your thoughts.

2. Begin to breathe comfortably and notice how the breath lengthens as you start to relax.

3. Now bring your attention to your torso as you breathe. Imagine the breath slowly filling the belly. Once the belly is full, picture the breath inflating the middle of your lungs beneath the rib cage. When the lower lungs are full, imagine that you are now filling the space beneath the breastbone. Once you have completely filled your torso with air, slowly exhale—first emptying the space beneath the breastbone and then the space behind the ribs and finally the belly.

4. Rest for a moment in the place where there is no breath and then begin the process again. Repeat a few more times and then let the breath come back to your normal rhythm. Come out of your restful position, whenever you are ready.
©Brenda K. Plakans. All Rights Reserved.

Tuesday, June 27, 2006

Sneaking into a Stretch


This summer, I am slowly working my way through H. David Coulter’s Anatomy of Hatha Yoga. He is an anatomist, and the book is a very thorough scientific explanation of how the body’s skeletal and muscular systems work vis a vis yoga. Fascinating, but very dense. I have to take notes as I read or I will never remember any of it. But, you, lucky reader, will benefit from my careful reading, because so much of what I am learning is spilling into my teaching and understanding of yoga. You get the Reader’s Digest version, as it were.

Right now my lesson plans are influenced by Coulter’s explanation of muscle reflexes and how they affect a muscle’s response to stretching. More specifically, I’m thinking about his discussion of the Myotatic Stretch Reflex. This is the reflex that is exhibited when you tap your kneecap or land on your feet after jumping; your muscles automatically contract after a sudden move to maintain your balance and absorb shock. It can also lead to tight, shortened muscles if the reflex is enacted a lot and not counter-acted with stretching (say, after a jog or hike). To prevent this automatic response of contracting, you have to ease into a stretch slowly so the muscles stay relaxed and are able to lengthen.

Experiment with easing into a stretch and notice how much length you can get by moving slowly (but don’t overdo it, always let the muscle open at its own pace). Here are slooow versions of Hastasana and Paschimottanasana for you to try. (Next month's issue will feature reader's contributions to Humor in Loose, Comfortable Uniform and Life in These Sanskrit States)

Slow stretches for Shoulders and Calves
1. Hastasana
(Overhead Arm Stretch) In a comfortable, cross-legged seated position, interlock the fingers and stretch the arms in front of you, opening the space between the shoulder blades. Turn the palms away and slowly begin to raise the arms, until you feel your shoulders start to lift. Stop there and press your palms away, keeping the arms straight.
-Then, slightly bend the elbows and continue stretching the palms overhead and notice how the stretch moves into the shoulder joints.
-From here, begin to straighten the arms while keeping the shoulders away from the ears, stopping whenever you need to even if the arms aren’t straight. Notice how much deeper you are into the stretch than you would have been if you just kept lifting your straighten arms.
-Repeat with the fingers interlocked the “other way” (with the other index finger on top).

2. Paschimottanasana (Forward Bend) Roll your blanket—tightly if you have fairly flexible calves, looser if not. Now stand with the toes and balls of the feet on the blanket and the heels on your mat. Straighten and come to Tadasana (Mountain) making sure the tailbone points down to the floor and the shoulders are balanced over the hips. Breathe into this alignment and feel the calves start to open.
-With the hands in the hip crease (where the thighs meet the pelvis) begin to fold forwards from this joint, keeping the lower back long and the chest lifted. Reach down for the floor or your block when you are as far as you can fold. Try to sink your heels and balance your weight between the front and back of the foot. Breathe into the length of the spine and the continued opening of the calves.
-Now, slightly bend the knees and step off the blanket. Stay in the forward bend position, but notice how much further you can bend forward—or how much more comfortable the position becomes. Continue lengthening the calves and, if you want to deepen the pose, release the spine and let the head and shoulders hang down towards the floor. Cross the arms and tuck your hands into elbow crease so the weight of the upper body helps open the spine and increases your stretch.
-Slowly re-engage the spine and, with your hands on your thighs, come back to standing.
©Brenda K. Plakans. All Rights Reserved.

Thursday, June 22, 2006

Hip Openers (Part Two)


As I mentioned before, there isn’t really a “hip” muscle, just all the muscles that connect the pelvis, spine and thighbones. And the pointy knob on your lower side front that is called the hipbone is actually the top of the pelvis. So the term “hip” is a little misleading when talking about anatomy—we’re really talking about the various elements that help stabilize the pelvis and the lower spine. There is a variety of yoga poses called hip openers that focus on this area and help strengthen the muscles and increase flexibility in the joints. I want to focus on a few of them in this posting.

While practicing the following sequence, keep your focus on the balance of your pelvis. When standing, the tailbone should remain pointed towards the floor and the hipbones (for lack of a better term) should be level—this means the pelvis is in a vertical position. There is a gentle curve at the lower back that appears naturally when the pelvis is upright and balanced; the lower back rounds or overarches if the pelvis is tipped too far back or forward. Try to maintain this gentle curve in the spine while doing the following poses.

Hip Opening Sequence
1. Sukasana (Easy Pose) Sit in a comfortable, cross-legged position with the sitbones on a folded blanket. Increase the height of the blanket if you can’t sit without rounding the lower back. Take a few minutes to really concentrated on balancing the pelvis and lengthening the spine.
2. Dandasana (Staff Pose) While keeping the spine long and the pelvis balanced, stretch your feet in front of you and press the soles of the feet away so that the leg muscles engage.
3. Paschimottanasana (Forward Bend) Wrap your belt around the balls of the feet and begin to pull yourself forward, leading with the belly button. You are now tipping the pelvis forward to lengthen the back of the legs. Don’t round your lower back!
4. Tadasana (Mountain Pose) Come to standing and realign the spine and pelvis.
5. Gomukhasana (Cow’s Head Pose) Stretch the arms into the Cow’s head position, while maintaining the neutral curve in the lower back. Do the stretch on both sides.
6. Virabhadrasana II (Warrior 2) Concentrate on keeping the hips squared so that the belly button faces the same direction at the breastbone. Roll the thighs out so that the knees are aligned with the tops of the feet. This pose is a powerful hip opener, because your muscles are working very hard to keep the hips squared and support the weight of the torso at the same time. Try to hold the pose for 6-7 breaths.
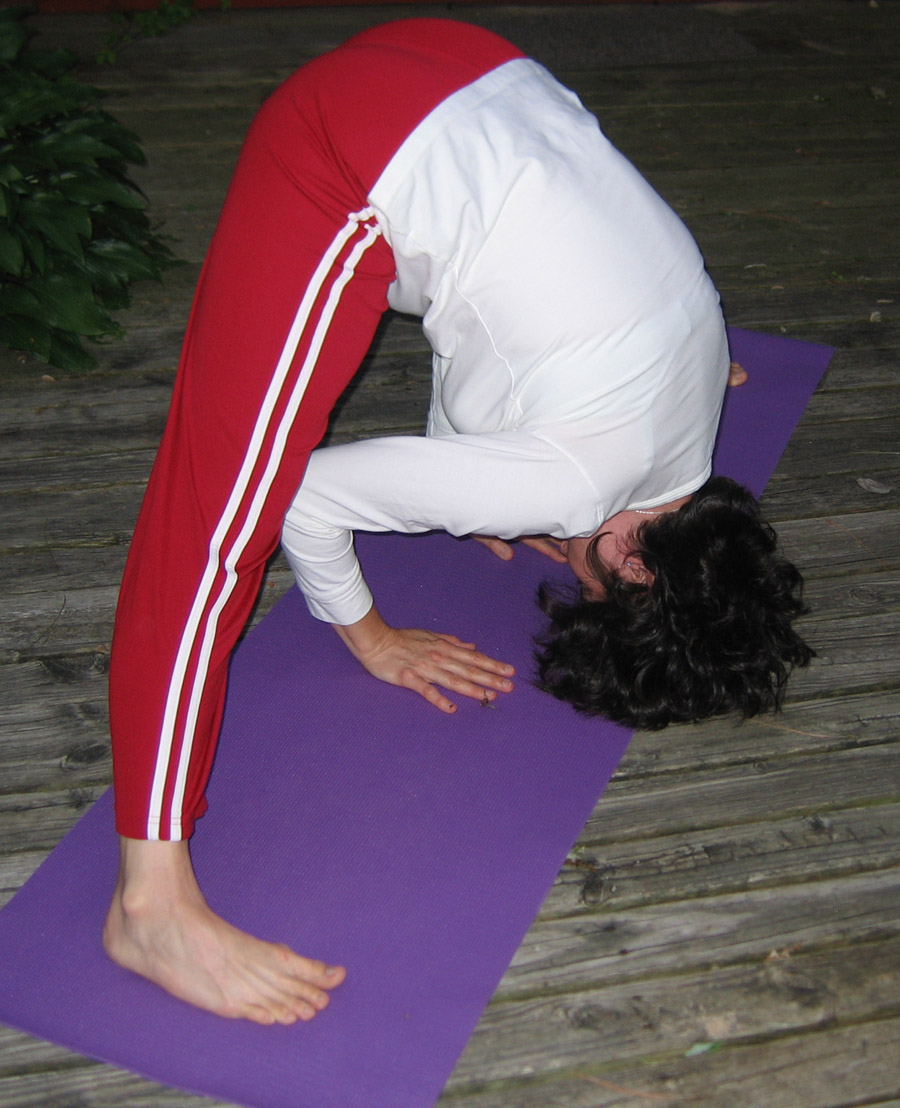
7. Prasarita Padottanasana (Wide-angle forward bend) Step the feet apart another foot or so from your Warrior stance. Check to see that the edges of the feet are parallel and the feet are grounded evenly between the inner and outer edge. Don’t let the ankle collapse. Keeping the spine long, fold forward from the hip crease and rest your hands on your block or the floor beneath your shoulders and breath into the length of the spine and the work of the ankles. Then release the back and walk your hands towards the feet, letting the head hang toward the floor. At your deepest bend, check that the ankles are still engaged and, if you want, tip your tailbone towards the ceiling to lengthen the back of the legs. This pose involves the same kind of work as Warrior. After a few breaths, re-engage the spine and then come back to standing.
8. Tadasana (Mountain) Let your body realign and check the curve of the lower back.
9. Baddha Konasana (Bound Angle Pose) Try this pose seated against the wall or, for greater relaxation, lie on the floor (See June 12 for more details).
10. Savasana (Corpse Pose) Release the belt and stretch out the legs. Take a moment to really align the spine before relaxing into the support of the floor.

©Brenda K. Plakans. All Rights Reserved.

Monday, June 12, 2006

Hip Openers (Part One)

Tight hips…it sounds like something you might strive for; in this case, however, “tight” means stiff and inflexible rather than slender or sexy. And, actually, it isn’t really your hips that are tight but the various muscles in the thighs and lower back that connect to the pelvic bone that need stretching. If these muscles are tight, they can really affect the way you use your knees and lower back, since these are the areas that overcompensate when you have inflexible hips.

Tightness in the hips, thighs and lower back is common in athletes (especially runners and bikers) who have very strong leg muscles, but these muscles are often contracted from the movement required in these sports. Men’s hips tend to be tighter than women’s. Older people’s hips have less flexibility than younger people’s. Don’t despair if you are a 50-plus male marathoner, though, because there are many yoga poses that will help open and lengthen the muscles your legs, hips and back. And even if you aren’t an athlete, hip openers will give help open up the lower back and improve your posture.

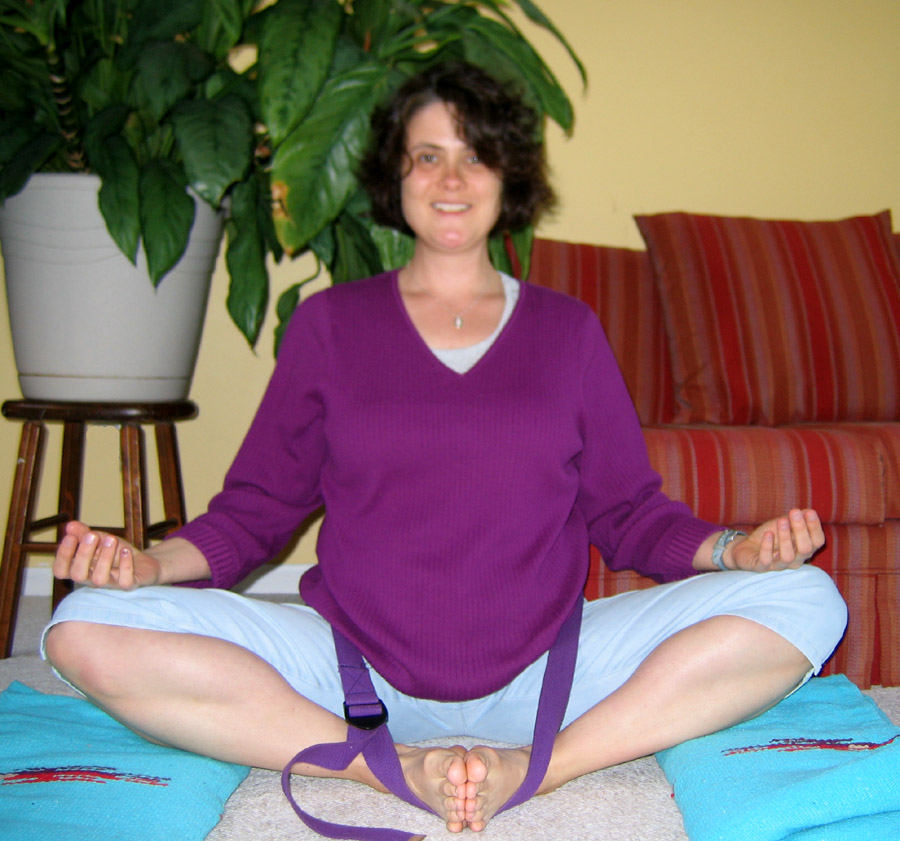
Supta Baddha Konasana (Reclining Bound Angle Pose) is one of my favorite relaxing hip openers. Sit on the floor in Bound Angle Pose (knees bent, soles of the feet touching), with several pillows or rolled blankets in reach. Make a large loop with your belt and place one end around your lower back and over your hip bones. Then slip the other end of the loop around the outside edge of the feet and tighten the belt so that the feet are pulled close to the body (as close as is comfortable). Then ease yourself back, first onto the elbows, and then to the floor. Place the pillows or blankets under the knees so you can relax your legs into the support of the pillows, while keeping the feet drawn towards the body. If it is uncomfortable to lie on the floor, keep yourself at an angle by leaning on a pillow or just rest your back against the wall.

Because you are so well-supported in this position, you can really start to relax and open the muscles in the thighs and hips. The belt keeps the feet drawn in without requiring much work in the legs or back and the pillows let the hip joints release since they aren’t holding the knees up. Try to let all the muscles of the lower body surrender into this comforting support. Let yourself rest for 10-15 minutes in this position and then slowly release the belt and unbend the legs. When you come back to sitting you should notice a pleasant stretch in the hip and groin area.

Try to do this stretch a few times every week (maybe in the evening while watching TV or reading). As the muscles start to lengthen you will find this pose more comfortable and—in that cyclical way of yoga— you will want to hold it longer. I like it as a variation on Savasana (Corpse Pose) because the unusual positioning of the legs keeps me more focused on my body and more present in my mind. You could try a breathing exercise in this pose.

Regular practice of Supta Baddha Konasana will make a whole class of hip openers more enjoyable. You may notice your lower back releasing which makes twists and forward bends easier. So, work on this all you leg-oriented athletes and in my next posting I will give you a series of poses that will take advantage of your now “un-tight” hips!
©Brenda K. Plakans. All rights reserved.

Friday, June 02, 2006

Downward-facing Yogis

When I was at the Y a few weeks ago, I watched a group of 10-year-old kids playing freeze tag in the gymnasium. It was a disparate bunch; some of the kids were really into the game while others were off by themselves on the sidelines. One gymnast-girl was cart wheeling around and doing a cheer routine. Another Harry-Potteresque boy kept throwing himself into a handstand, walking a few steps on his hands and then crashing back to earth. I was impressed with the ease that these two kept unending themselves over the hardwood floor. I was impressed that Harry never lost his glasses.

Why do we stop going upside down? I used to do handstands all the time in junior high PE classes, but the 15 years since seventh grade had been a very loooong time of not being overturned. My first yoga handstand came in a Philadelphia class in 1990. Initially it was a terrifying prospect--the image of a snapped neck and paralyzed back shimmered. The headstand was very basic, supported by a tripod of my forearms and head, against the wall. After a moment of thinking, “Dear God, am I really going to do this,” I kicked up, wobbled then steadied. I was probably only up for about a minute, but when I came down I had a great feeling of lightness (and a bit of a buzz in my neck).

But now, I find inversions a very satisfying series of poses. Some can be thrilling, with a great sense of achievement afterwards, like Adho Mukha Vrksasana (handstands) and Salamba Sirsasana (headstands); others are more calming and centering like Prasarita Padottanasana (Wide–angle forward bend) or Viparita Karani (Legs-Up-The-Wall). This combination of energizing and calming stems from the fact that they require focused upper body strength and a perfectly aligned spine, which engage all the muscles of the torso. At the same time, the head is lower than the heart, which increases the circulation to the brain and settles the mind. Mentally, you have to overcome your fear of falling or being disoriented, which is a real confidence-builder.

It’s such a bold gesture of trust to assume that your arms and torso have the strength and stamina to support you. It’s such a joyful move to kick your legs over your head and let your hair hang down. Once you find that source of trust and joy, an inversion will seem as easy as most other yoga positions. You might not even care that you forgot to take your glasses off…

A Short Practice Leading to Salamba Sirsasana (Headstand)
**Don’t try a headstand, until you have learned how to do one with an experienced teacher. S/he will teach you the proper positioning so you don’t hurt your neck. **
1.Tadasana (Mountain Pose)-Feel your tall, aligned spine as you ground down through your feet and stretch up through the top of the head.
2.Hastasana (Overhead Arm Pose)-Add the arm stretch and feel the side ribs lift, while keeping the shoulders away from the ears.
3.Uttanasana (Intense Forward Bend)-Fold from the hips while stretching through the backs of the legs. Keep the weight balanced between the balls and heels of the feet.
4.Adho Mukha Svanasana (Downward Facing Dog)-Keep the spine elongated while the shoulder blades slide down the back (away from the shoulders).
Balasana (Child’s Pose)-Come down to the floor and let the whole body relax
5a. Salamba Sirsasana (Headstand)-Try this against the wall, or, better yet, in a corner so that you have support at your back and heels. Use a folded blanket under the head and forearms for cushioning. Keep the elbows shoulder-distance apart so you can press the forearms to the floor. Kick up each leg separately, until the heels are against the wall. Try to recall the aligned feeling from Tadasana, except this time reach through the head to the floor and the heels to the ceiling.
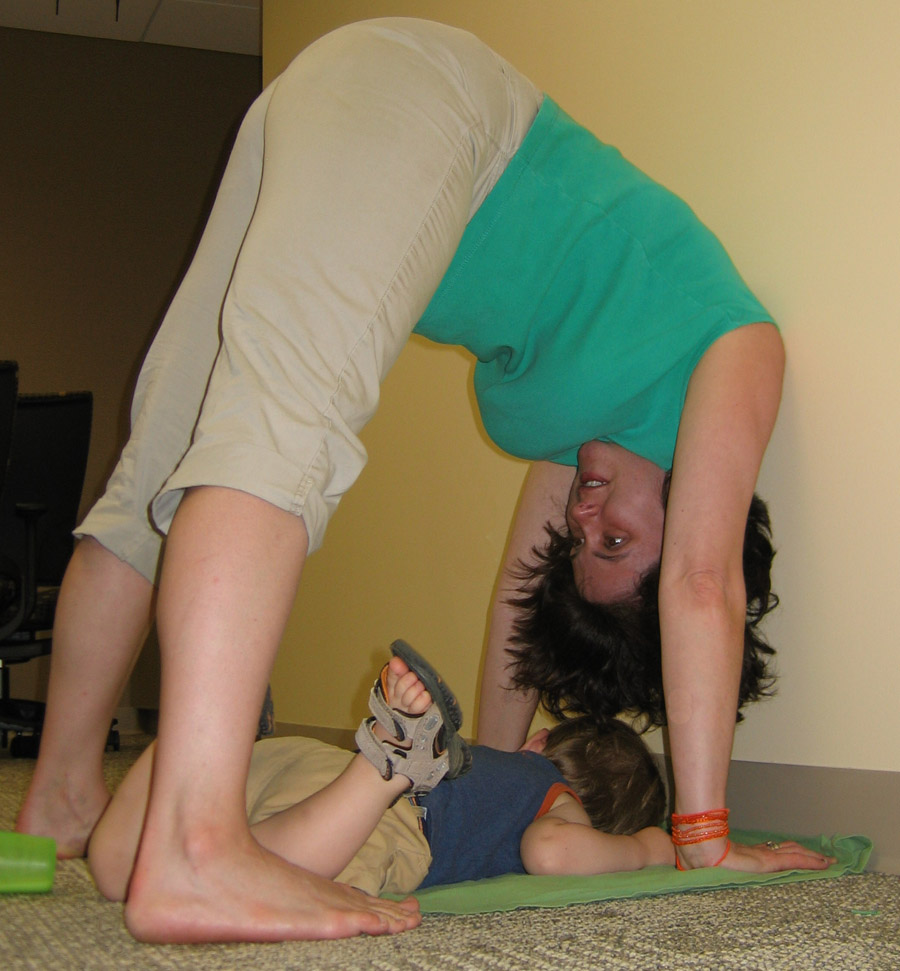
5b. Half Head/Handstand-if you’re not ready for the full pose, try this modification. Make a tripod with the hands and forearms and place the top of the head (halfway between the ears) on the floor so the palms are resting against the back of the head and the knuckles are gently resting against the wall. OR, place the hands flat on the floor and straighten your arms as in a hand stand. Straighten the legs as for Dog and rest your upper back against the wall, so that only part of the torso’s weight is balanced on the head or hands. Stay as long as you are comfortable. [The little yogi with me, my son Eamonn, is demonstrating a version of Savasana]
6. Balasana (Child’s Pose)-Lower yourself back to the floor and rest as long as you like.
7. Seated twist-Take advantage of your stretched-out torso as you slowly twist the ribcage around the spine, while 8. sitting in Sukhasana (Easy Pose).
9. Savasana (Corpse Pose)-try to recreate the alignment from your Mountain and Headstand, while sinking into the support of the floor. ©Brenda K. Plakans. All rights reserved.


Wednesday, May 24, 2006

An Ode to The Dog


I once had a teacher who recommended “a dog a day” as a healthy yoga habit, and I find it to be as true as the admonition on apples. It is one of the most efficient poses and engages all the usual trouble spots with an elegant folding and inverting of the body. Shoulders stabilize while the back extends; hips lift while the legs lengthen. The head is lower than the heart, which calms the mind, while the large muscles of the back and legs are energized in order to ground through the hands and feet. This combination of engagement and release is what makes Adho Mukha Svanasana (Downward Facing Dog) such an effective pose.

Downward Dog is very adaptable and it is fun to try different modifications to see how the pose changes depending on where your body is placed. Experiment to see which variation best complements your regular Dog. You can:
-Lift your heels three or four inches and press them to the wall instead of the floor. Notice the additional rotation in the shoulders.
-Press the inside edge of the hands to the wall and feel the heels stretch closer to the floor, opening the backs of the legs.
-Place the hands and feet as wide as your mat and feel the engagement in the back muscles.
-Invert the dog at the wall by pressing the hands to the wall at hip height and stepping the feet back until they are beneath the hips--making a right angle between the body and legs. Notice how this position stretches the armpits and sides of the torso. You can deepen the rotation in the shoulders by relaxing the upper back and letting the head hang between the arms (this is a good modification if a regular Dog is too much weight on your arms and wrists).

If you don’t have time to do anything else, or it is your day off from yoga, try to press up into a Dog for a quick 5-minute session. It is a complete practice in itself, especially if you can hold it long enough to let your mind settle into the rhythm of your breath. There is nothing more exhilarating than entering the weightless feeling of a completely balanced Downward-Facing Dog!

Practice
If you have a half-hour, here is a simple sequence, culminating with a freeing Downward-Facing Dog:
-Sukhasana (seated meditation)-concentrate on lengthening the spine so the back muscles are warmed.
-Hastasana (overhead arm stretch)-keep the shoulders low as you press your palms to the ceiling.
-Dandasana (Staff pose)-begin to warm the leg muscles.
-Padangusthasana (Hand-to-Big Toe pose)-focus on opening the backs of the calves and thighs.
-Tadasana (Mountain)-continue the alignment from the earlier Sukhasana as you stand.
-Gomukhasana-arms only (Cow’s head pose)-focus on the rotation in the shoulders as you stretch each elbow away from the other and toward the center.
-Uttanasana (Intense forward bend)-fold from the hips and release the head towards the floor, stretching out the spine.
- Adho Mukha Svanasana (Downward-facing dog)-come up from hands and knees, lifting the tailbone up as you ground down through the palms of the hands and soles of the feet…find the center of the pose so the hands and feet are supporting your weight equally.
-Balasana (Child’s pose)-fold down to the mat, resting the head and arms on the floor and releasing the hips.
-Twist- roll to the back and let the knees fall to one side, while grounding through the shoulders, then repeat with the knees on the other side.
-Savasana (Corpse Pose)-relax with the arms and legs outstretched and let the body release to the floor with each exhale. ©Brenda K. Plakans. All Rights Reserved.

Tuesday, May 23, 2006

Yoga is a Language


What never ceases to amaze me about Hatha Yoga is its adaptability. It is comprised of about 200 asanas (according to B.K.S. Iyengar’s Light on Yoga) that can be combined in seemingly infinite combinations. In this sense, Yoga is a language; it has a vocabulary of 200 “words” that take their meaning from how they are combined and with what dialect they are spoken. A more traditional yogi will see these words as immutable--they should only be used with the proper accent and correct grammar. A inventive practitioner is more flexible with the language and is open to new and unusual definitions of the words. One approach is faithful to the history of yoga; the other keeps it alive and relevant to today’s world.

The beauty of this language is that it benefits and illuminates no matter how it is spoken. Some teaching styles, such as Iyengar and Ashtanga, are exacting in their approach—there are proscribed ways to practice and strict arrangements of the asanas. Other yoga styles, such as Kripalu and Vinyasa, are more fluid and allow students to determine the rhythm and manner of their individual practice. With any of these traditions, you can choose which poses in what sequence fits your day’s mood, energy level, anatomical focus, etc. Depending on what you bracket a particular pose with, it can have a completely different feeling and style. These asana/words are so powerful and affecting that it doesn’t really matter how you choose to interpret them—they will help you focus and center.

So as you continue to deepen and expand your personal practice, keep in mind that you are participating in a dialogue between your body and this ancient art. How you choose to interpret and use this language is entirely up to you and can (should) change on a daily basis so it stays vital and interesting. No approach is better than another, it just depends on what you want and need on that particular day for that particular practice.

Examples of different pronunciations:
Using Trikonasa (Triangle Pose) as an example, note how the feeling of the pose changes depending on how it is approached.
A Formal Approach
1. Step the feet apart 3 ½ to 4 ½ feet, establishing your normal triangle stance.
2. Stretch your arms up overhead, keeping the shoulders away from the ears, and feel the side ribs lift.
3. Lower the arms to shoulder level, but keep the side ribs lifted, noticing the openness and lift in the chest.
4. Now, turn the right foot to the side and the left slightly towards the center. Shift the hips towards the left foot, keeping the arms stretched to the side and still focusing on the lifted ribs.
5. Stretch out and over the right foot, always lifting the ribs, and fold over the right hip into Triangle. (Notice the space you get through the torso with this approach).
6. Repeat on the other side.
A Flow Approach
1a. This time step your feet apart, turn the right foot out and the left foot slightly in. Lift the arms to the side and bend the right knee to come into Virabhadrasanana II (Warrior II). Hold for a couple of breaths.
2a. Now fold the right arm and hinge from the right hip towards the right thigh and rest the forearms on the thigh. Stretch your left arm overhead and twist the torso and head toward the sky, moving into Parsvakonasana (Lateral Angle Pose). Again, hold for a few breaths.
3a. From Lateral Angle, straighten the right leg and extend the right arm, reaching for the shin. Move the left arm back to center and twist the torso and head to look at the left hand. Now you are in Trikonasana (Triangle). Breathe a bit, and then come back up to center. Turn the feet back to center and lower the arms. (Notice the feeling of fluidity as you smoothly move from pose to pose. Enjoy the feeling of connection between these different poses as you experience their similarities and differences).
4a. Repeat on the other side. ©Brenda K. Plakans. All Rights Reserved.


Monday, May 22, 2006

Hello and Welcome!

I decided it was time to set up a yoga blog because my students often ask for additional resources and additional practice to complement their weekly classes. I figured I could take a little time each week to compose a 20-30 minute session and include some thoughts on that series of poses. This way readers of the blog could bring their yoga practice home and expand on anything they had been working on in class.

I have written these sequences assuming readers already have a nodding acquaintance with yoga terms and poses. My explanations are short, because I figure everyone either knows the position or they can check out one of my links to study it. None of these short practices should replace a regular class with a trained teacher; this is just to help make yoga a daily, or every-other daily habit rather than just a once-a-week occurrence.

I hope this helps and I hope you enjoy it!