As I mentioned before, there isn’t really a “hip” muscle, just all the muscles that connect the pelvis, spine and thighbones. And the pointy knob on your lower side front that is called the hipbone is actually the top of the pelvis. So the term “hip” is a little misleading when talking about anatomy—we’re really talking about the various elements that help stabilize the pelvis and the lower spine. There is a variety of yoga poses called hip openers that focus on this area and help strengthen the muscles and increase flexibility in the joints. I want to focus on a few of them in this posting.
While practicing the following sequence, keep your focus on the balance of your pelvis. When standing, the tailbone should remain pointed towards the floor and the hipbones (for lack of a better term) should be level—this means the pelvis is in a vertical position. There is a gentle curve at the lower back that appears naturally when the pelvis is upright and balanced; the lower back rounds or overarches if the pelvis is tipped too far back or forward. Try to maintain this gentle curve in the spine while doing the following poses.
Hip Opening Sequence
1. Sukasana (Easy Pose) Sit in a comfortable, cross-legged position with the sitbones on a folded blanket. Increase the height of the blanket if you can’t sit without rounding the lower back. Take a few minutes to really concentrated on balancing the pelvis and lengthening the spine.
2. Dandasana (Staff Pose) While keeping the spine long and the pelvis balanced, stretch your feet in front of you and press the soles of the feet away so that the leg muscles engage.
3. Paschimottanasana (Forward Bend) Wrap your belt around the balls of the feet and begin to pull yourself forward, leading with the belly button. You are now tipping the pelvis forward to lengthen the back of the legs. Don’t round your lower back!
4. Tadasana (Mountain Pose) Come to standing and realign the spine and pelvis.
5. Gomukhasana (Cow’s Head Pose) Stretch the arms into the Cow’s head position, while maintaining the neutral curve in the lower back. Do the stretch on both sides.
6. Virabhadrasana II (Warrior 2) Concentrate on keeping the hips squared so that the belly button faces the same direction at the breastbone. Roll the thighs out so that the knees are aligned with the tops of the feet. This pose is a powerful hip opener, because your muscles are working very hard to keep the hips squared and support the weight of the torso at the same time. Try to hold the pose for 6-7 breaths.
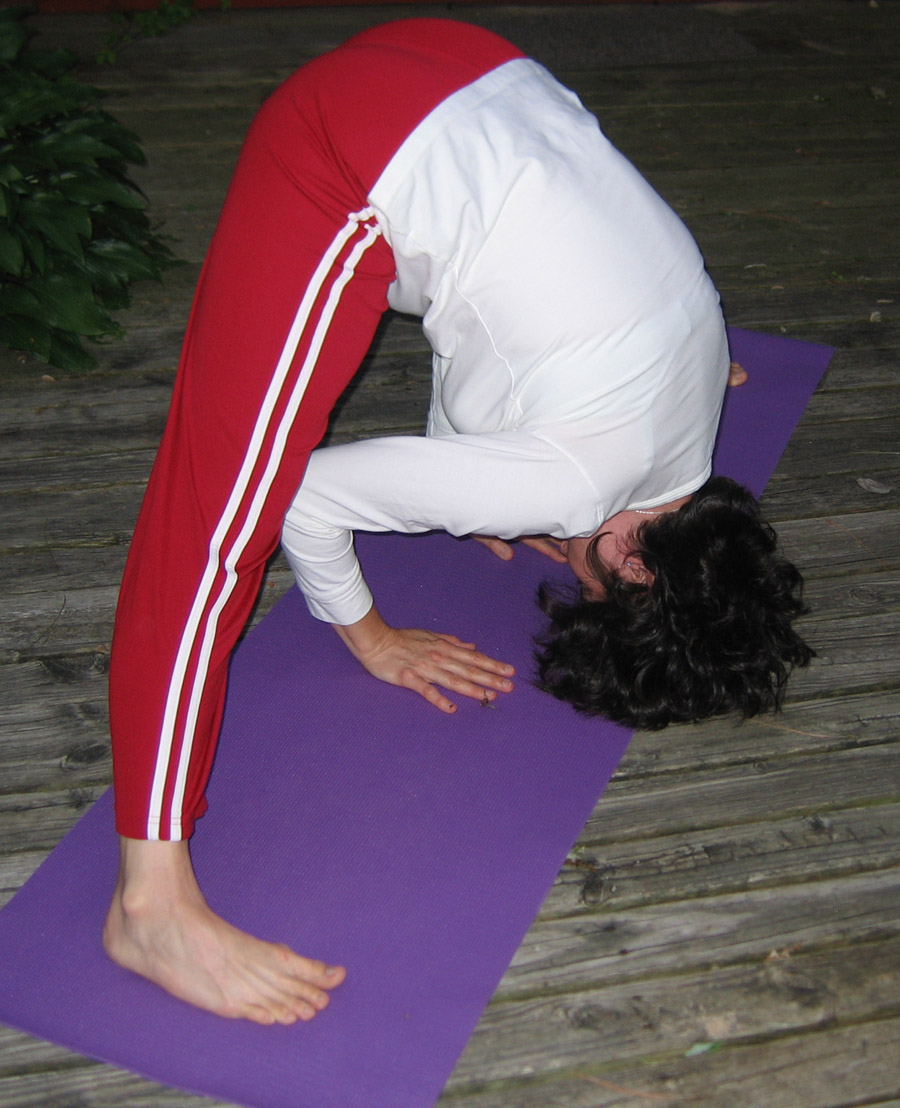
7. Prasarita Padottanasana (Wide-angle forward bend) Step the feet apart another foot or so from your Warrior stance. Check to see that the edges of the feet are parallel and the feet are grounded evenly between the inner and outer edge. Don’t let the ankle collapse. Keeping the spine long, fold forward from the hip crease and rest your hands on your block or the floor beneath your shoulders and breath into the length of the spine and the work of the ankles. Then release the back and walk your hands towards the feet, letting the head hang toward the floor. At your deepest bend, check that the ankles are still engaged and, if you want, tip your tailbone towards the ceiling to lengthen the back of the legs. This pose involves the same kind of work as Warrior. After a few breaths, re-engage the spine and then come back to standing.
8. Tadasana (Mountain) Let your body realign and check the curve of the lower back.
9. Baddha Konasana (Bound Angle Pose) Try this pose seated against the wall or, for greater relaxation, lie on the floor (See June 12 for more details).
10. Savasana (Corpse Pose) Release the belt and stretch out the legs. Take a moment to really align the spine before relaxing into the support of the floor.
©Brenda K. Plakans. All Rights Reserved.


No comments:
Post a Comment